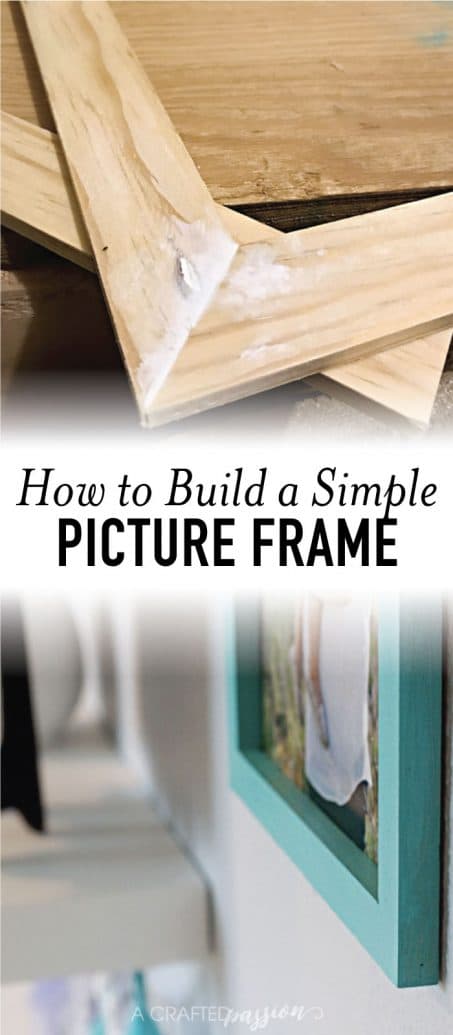
Can’t find the perfect sized picture frame to decorate your home? Learn how to make your own custom size picture frame with this easy tutorial!
You have the perfect picture, have the color scheme chosen, and the only frames you can find look terrible from the Dollar Tree or cost $50 from the craft store. So, what do you do? There has to be a happy medium! I was in that place as I was planning Mini Me’s gallery wall in her bedroom and rather than searching hopelessly for frames that were the perfect size in my budget, I figured I might as well just make them. And, IT WAS SO EASY! Since we all need picture frames in our life I figured I’d show you how to build custom size picture frames.
Let me show you how to do it…
What you need to make a custom size picture frame:
- Trim wood — I used 3/8 flat pine moulding that I found at Orchard Supply Hardware
- Wood filler
- Sandpaper
- Paint
Tools
- Chop Saw
- Table Saw
- Micropinner
Instructions
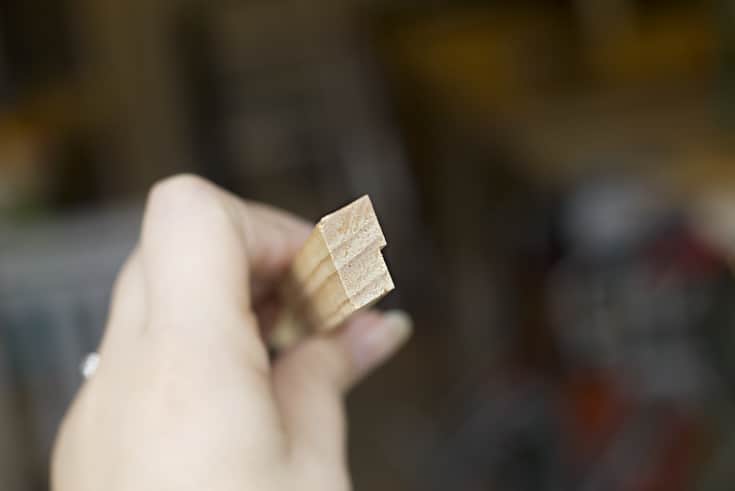
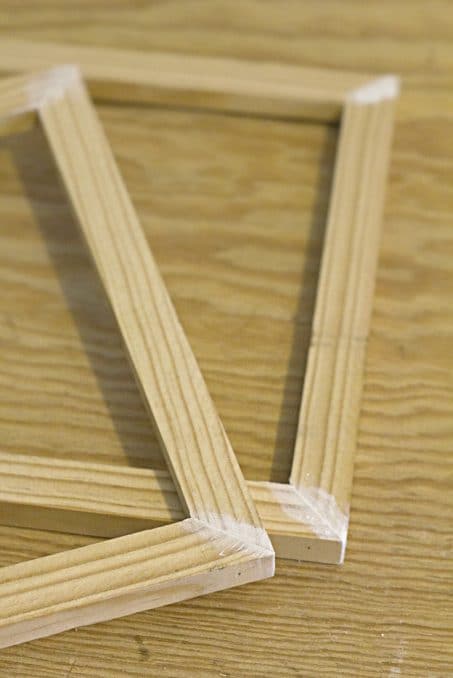
1 | Notch Wood
First, you’re going to start by making the notches in your wood thick enough for your picture to sit on the ledge. Set your table saw about half the height as your trim. You can just eyeball this. Mine was about 1/2 inch tall.
Then, set your fence so the trim wood just barely hits the blade. You just want to cut a thin piece of wood away for your picture to sit in.
Start your table saw and run your trim wood through the table saw. Be super careful and go slowly as you feed it through.
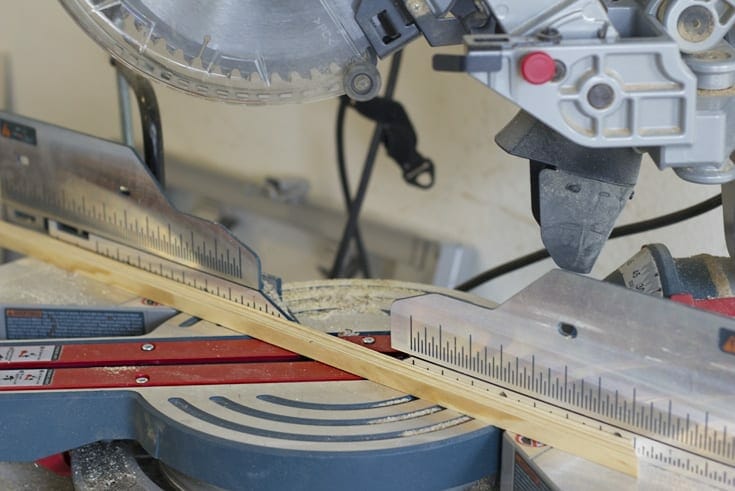
2 | Cut Wood
Next, it’s time to decide the size of your frames. I had 8 x 10 pictures to frame so my frames measure 9.5 x 11.5 inches. If your notches were cut at a different height than I did then you might need more distance for your picture to fit.
Cut your trim so that you have enough sides for your frames. Remember…measure twice, cut once. I cut one piece just a hair too short and it messed up all the other sides. Thankfully, wood putty is a wonderful thing and this project is very forgiving.
For a more professional look, cut your wood at a 45 degree angle remembering to measure from the outside edge opposite your notched wood.
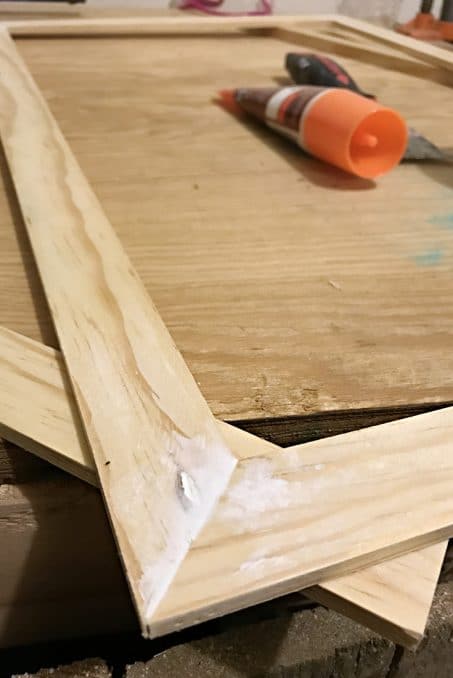
3 | Pin
If you have a micro pinner, this is the perfect tool for that! You can dab a little glue on each cut edge and pin the corners together to form a frame or forgo the glue — like I did — and just shoot a pin in each side. Don’t worry if the corners don’t align just perfectly, it’ll all work out in the end. Manipulate your frame a little before pinning the last edge to make sure you have 90 degree angles in each corner.
4 | Filler
Once your frames are put together, grab your wood filler and fill the gaps. This really helps give the frames a finished look. I just used my finger and put it in all the cracks.
5 | Sand
After the wood filler dries at least an hour, grab your sandpaper — 180ish grit is good to get it nice and smooth — and sand all of the surfaces. Be sure to get the inside corner well so it makes a nice 90 degree angle.
6 | Paint
After your frame is well sanded, give it a good cleaning and then paint!
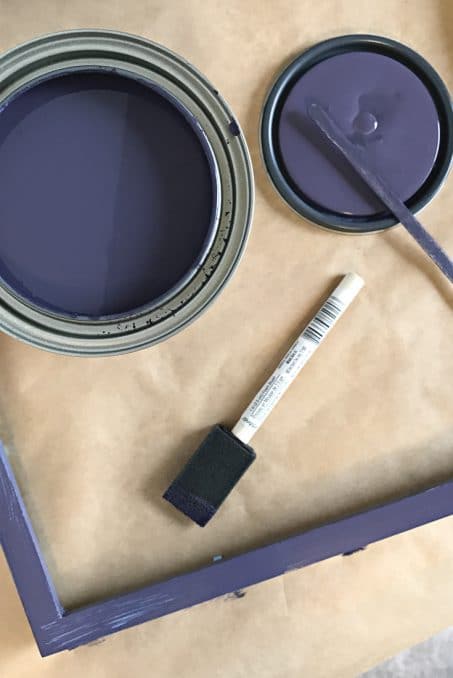
I used Benjamin Moore Plum Royale and Benjamin Moore Poolside Blue to match the color scheme in Mini Me’s room.
P.S. If you haven’t seen the full bedroom reveal, check it all out here! It turned out so cute and, more importantly, she loves her Montessori-inspired toddler bedroom.
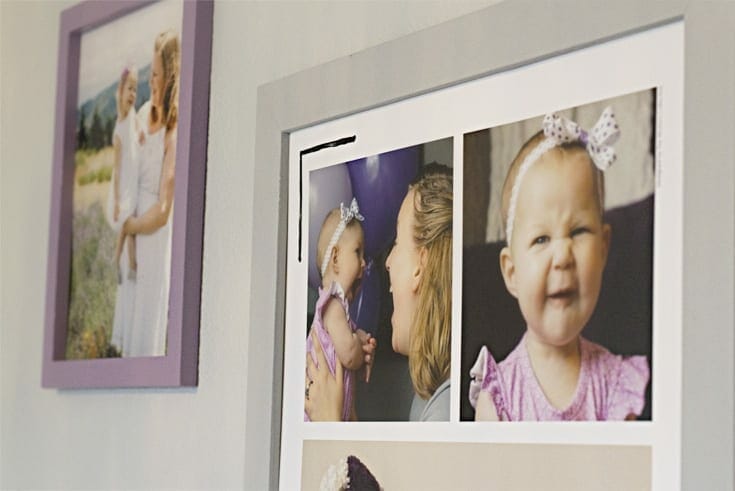
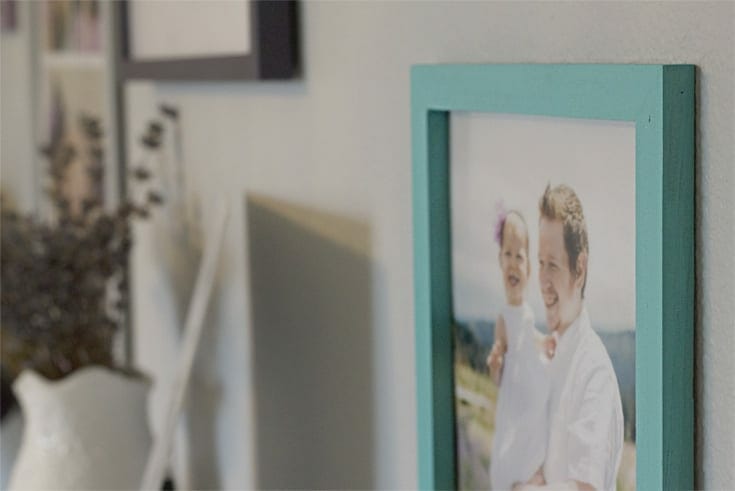
And that’s all there is to it. I love how these frames turned out! Nice on the budget and match our color scheme perfectly for the room to help tie everything together!
So, now it’s your turn!
Ready to build picture frame?
Do you have a picture sitting around begging for a DIY frame? Or maybe a gallery wall planned in your head that need some odd-shaped frames? Now, you know how to make them.
Happy building!


Very inspiring post! One of my daughters is very creative and has made some beautiful pieces of art that are currently sitting in a folder in the office. After reading your post I think I need to get busy making some custom frames.
I know this is an old post, but I was wondering what you did for glass? The odd shaped items I would like to frame will definitely need the support of the glass as they are very old… Trying to find a way to frame all 7 items without spend $500!