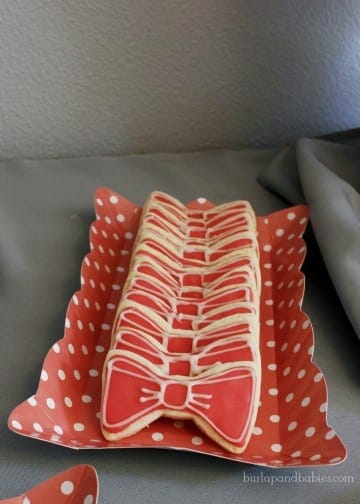
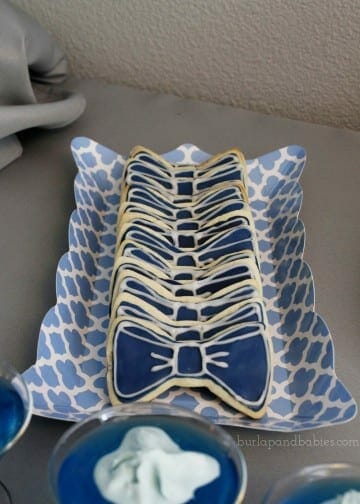
When trying to decide what was important for me to have at the gender reveal party, I kept coming back to a picture of pink and blue gender reveal cookies in my head. They just helped tie the food into the theme of bows and bowties and so I set off to figure out how to make it happen.
First off, I found a bow cookie cutter at Joann Fabric & Craft Store. With a 40% off coupon I think it came out to less than two bucks. Then the day before the party I made up a batch of this sugar cookie recipe from The Shabby Creek Cottage. Be sure to watch the cookies when they’re baking to not overdo it. The edges should just start to turn golden brown when you pull them out. The first batch came out around 8 minutes and by my third batch they came out around 12 minutes. I think this had to do with how long the dough had been out of the refrigerator and how much it had been rolled to get it the right thickness. The dough worked perfect though and didn’t spread!
One trick we learned from the trusty Alton Brown is to use a serving spatula under the cookie cutter to transfer each cookie to the baking sheet before removing the cookie cutter. This helps keep the shape better during the transfer.
After your cookies have had plenty of time to cool comes the stressful fun part!
If you’ve never used royal icing before, you might want to practice before decorating on your beautiful party cookies. I used a combination of a few recipes until we found the perfect royal icing consistency but mainly I used the Royal Icing 101 tutorial from Tips from a Typical Mom. Most recipes will tell you to buy meringue powder, but the milk, corn syrup, and powdered sugar worked fantastically for us!
You will want a thicker consistency to outline your cookie, then add some more corn syrup for the flooding (or the inside part). For the piping of the outline, I just used a ziploc bag and cut a tiny corner off. Practice a few times on cookies that either broke or don’t look perfect to get a feel for it. Just remember, your party guests will love them no matter what they look like so don’t stress it if you mess up!!
Let these harden for about a minute or two before flooding it with the middle icing. You want the edging to act as a dam so the icing doesn’t pour off the cookie but you don’t want to wait too long either. Once you fill a cookie, use a toothpick to spread it out. This stuff is like magic and will seriously just dissolve all the little imperfections!
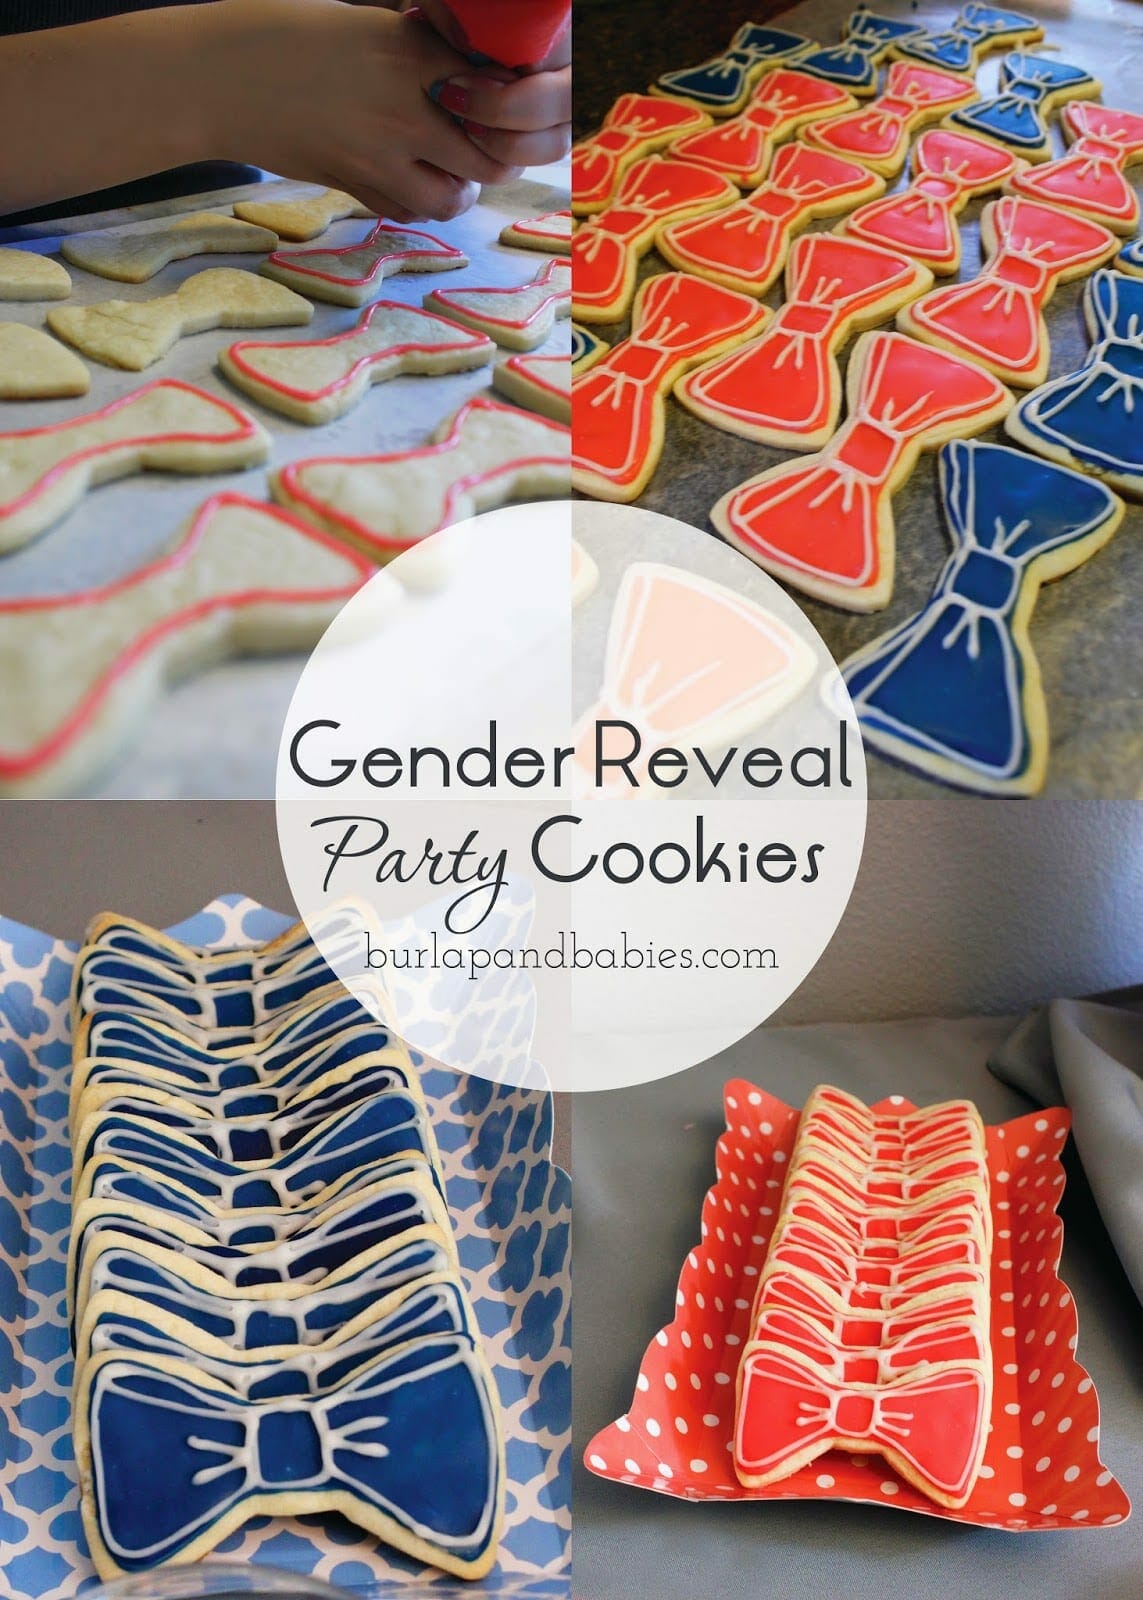
Now’s the hard part….let these harden for a good couple hours before doing your detail piping on top. Really. It’s better if you just wait. While you wait, I suggest drawing out what outline you want on your bow. Some people do different designs depending on if it’s a blue or a pink bow. Others just do the outline of the bow and no inside details. Or you could go my route and just wing it and have the first ten cookies look different. (I highly suggest you don’t go that route but it’s up to you…just remember, I warned you!)
Now, remember! They won’t look perfect…unless you’re a pro, in which case will you come help me make cookies for my next party?! These cookies are, however, made with lots of love and excitement as you plan for this new little one coming in to your life.
And don’t they look just adorable?!
To read all about my full Gender Reveal Party, check it out here!
Ahh sooo cute!! You did such a great job on those! I totally wish I had done something cute like this for our reveal. I’m excited to see how to do the scratch-its too, I might want to do that for our next baby someday! :)
Thanks Amanda! I had so much fun making them! :)
Those cookies turned out so cute!!! I love your little fun parts to your gender reveal! :-)
Thanks Susannah! I love planning the little details of parties. :)