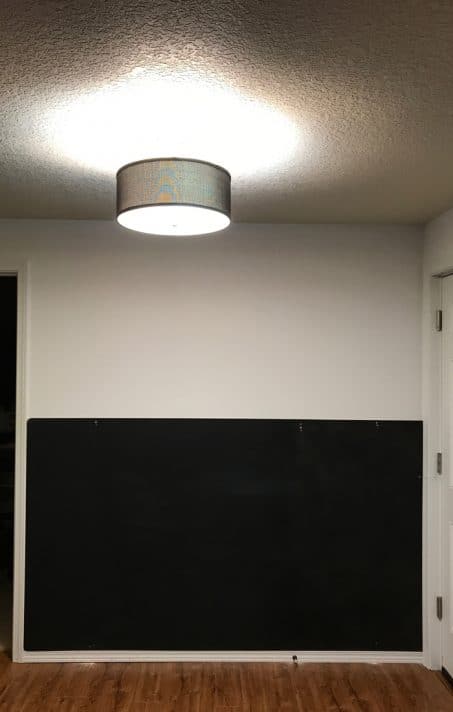
Make an impact with this dramatic wood shims wall project. This tutorial shows you exactly how to make it with tips on how to save time and money. This is perfect to add in your home entry.
Have you ever been walking down the aisles of Home Depot and seen something and instantly knew what project you should make with them?
Me either.
I’m a plan it out kinda DIY-er. I like to have a plan and map things out long before I ever start actually doing. Sometimes that’s good. Sometimes it stunts me and I have a hard time starting.
However, our entry was NOT one of those things.
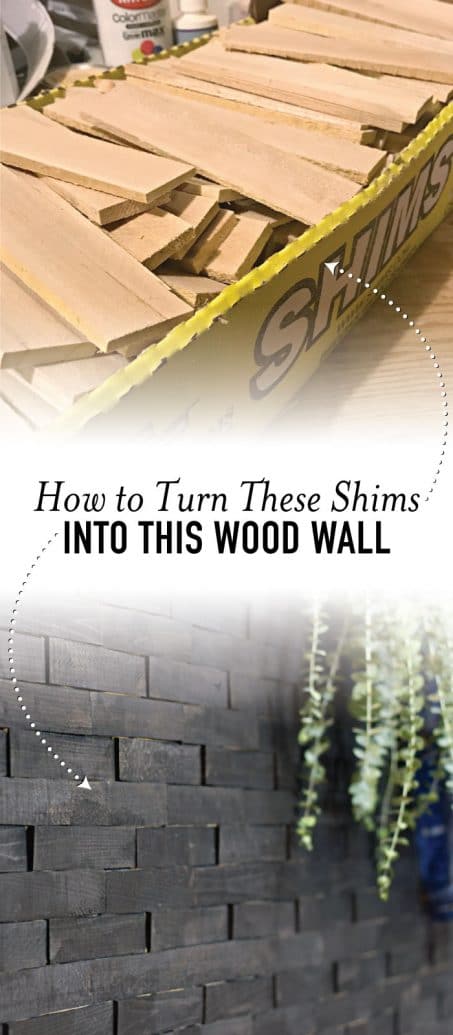
I saw some wood shims at Home Depot and figured those would be perfect to add texture to our entry wall. I figured a few hours of work and it’d be done.
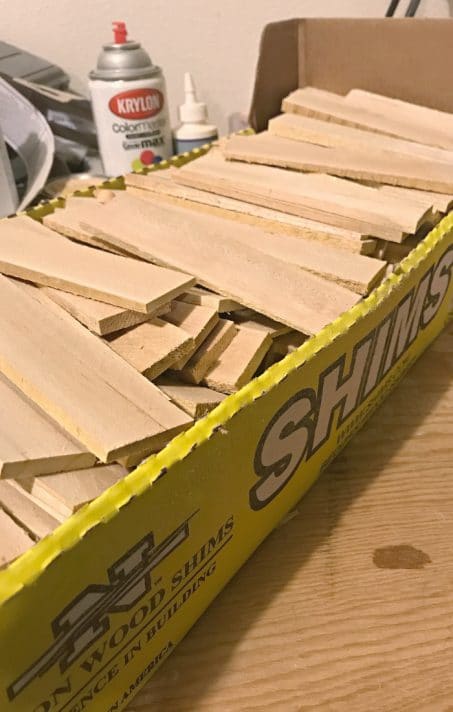
I bought two packs of 42 in each thinking that would be more than enough.
Little did I realize how much work I was getting myself in to. It was absolutely, 100% worth it though.
If you want to create a wood shims wall, I’m here to show you how. It’s actually really easy, it just takes time.
Check out this little video I put together to show you the process and then get the full tutorial below…
*This post contains some affiliate links for your convenience (which means if you make a purchase after clicking a link I may earn a small commission, but it won’t cost you a penny more)! Click here to read my full disclosure policy.
Here’s what you’ll need to create your wood shims wall:
- Thin plywood to cover the whole space you’ll be covering in shims
- Drywall anchors or stud finder
- Screws
- 1” square wood trim the width of your space
- Wood shims
- Wood glue (this is my favorite)
- Wood stain or paint
Tools
- Saw (I used a chop saw and bandsaw, but a miter box would totally work too for this project. Just be sure to have someone cut down your plywood to the correct size at the lumber store before you buy it.)
- Belt sander
- Pencil
1. Guesstimate
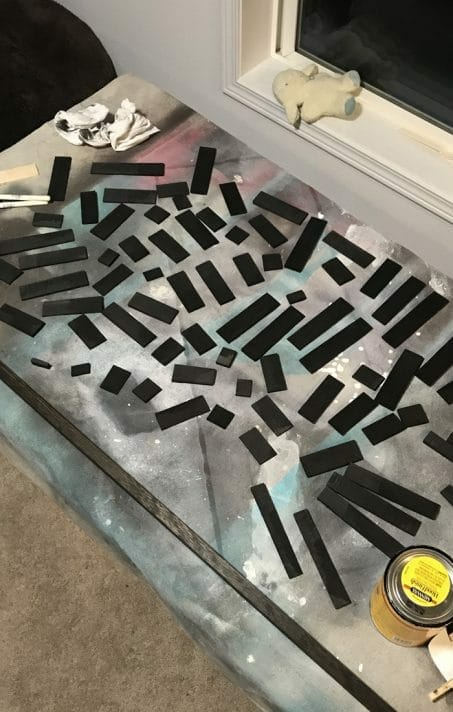
Don’t make my mistake and guesstimate completely wrong how many shims you’ll need. Measure where you want your shims going and then you can do a little bit of simple math to figure out about how many you’ll need. We had 38 rows of about 14 each. A few rows had more than 14 depending on the random pattern. And this was after cutting all the shims down to approximately 6 inches long. Wood shims get pretty thin at the end so I knew we’d need to cut them down to make the wall a bit more refined.
We ended up needing 536 shims including the half ones on the bottom row.
2. Cut Shims
Once you have all the shims you’ll need, time to cut your shims down. I chose to cut them all to about 6 inches long and threw the thin end into the scrap pile.
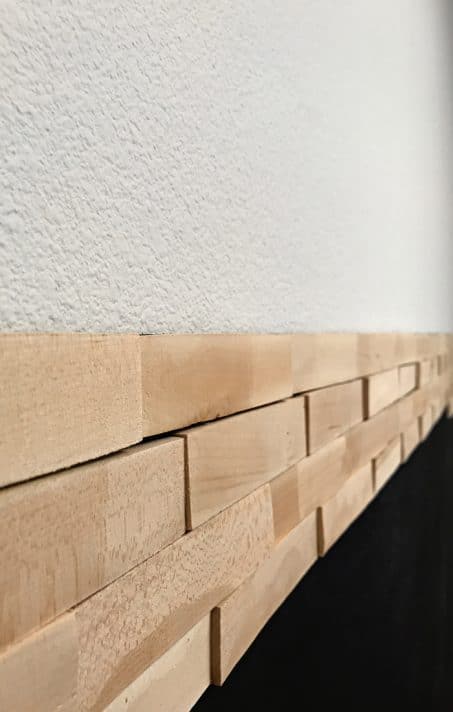
3. Sand Shims
Now it’s time to sand your life away. I’m not going to lie, this takes a long time! If you’ve never worked with wood shims before, they are rough. They aren’t designed to be cute. They are used to be functional and practical mainly for home builders.
I tried many different methods of sanding and using the small belt sander was by far the easiest. I just sanded each side of the shim including the edges until the edges looked all pretty square and the front and back were angled pretty uniformally.
Sanding 536 shims took probably 6-7 hours at least. I turned on a podcast and would sand during naptime and after kids were in bed for what seemed like days. Once I got a good rhythm down though, it probably took about 30-60 seconds per shim.
Related: 11 Mompreneur Podcasts You Should Listen To
Please make sure and wear a dust mask while doing this step because that fine wood dust will just get right into your lungs and can cause issues.
I suggest prepping all your shims before starting work on your wall.
Once all the shims are cut, sanded, and given a good vacuum to get rid of as much dust as possible, time to move onto actually putting the wall together.
You could attach your shims directly to the wall, but with this much glue, you’re going to make permanent damage if you ever want to remove the feature wall. With only 4 screws holding up the plywood, if we ever want to remove it, all we need to do is pry off the 4 shims that are covering the screw holes and then can remove the whole wall feature. All we have to do then is to fill the screw holes, paint over, and it’s all brand new.
4. Cut Plywood to Size
So, you need to cut your plywood down to size to fit perfectly in your space. make sure that the depth of your plywood plus shims at the fattest point won’t be deeper than your trim if you’re going against door trim or baseboard.
5. Paint Plywood
Once it’s cut to size, I highly suggest you paint or stain the board to match what the finished shims will look like. There will be gaps in your shim rows so this helps make it all blend together.
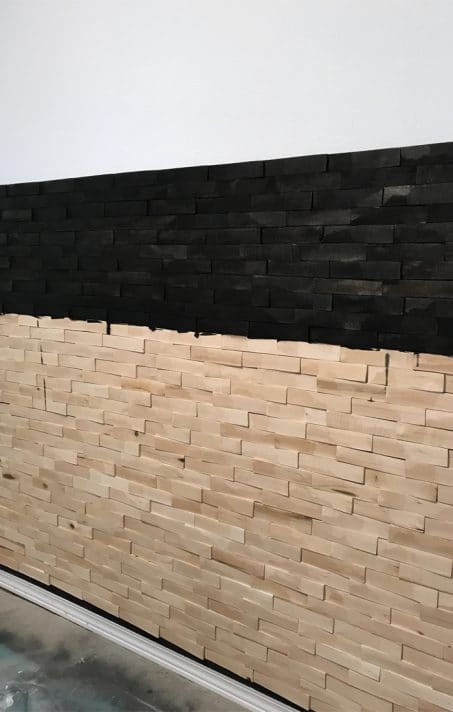
Since I knew I was using ebony stain, which is really dark, I just gave the plywood a few coats with black spray paint.
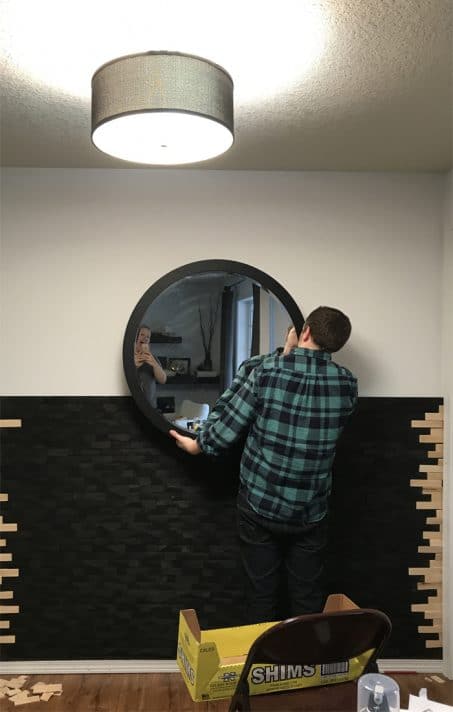
6. Attach Plywood
Once your plywood is done drying from the paint or stain, it’s time to attach it to the wall. If possible, grab a stud finder and mark where studs are so you can attach the plywood with wood screws directly into the studs. If you can’t drill right into the studs, make sure and insert drywall anchors before screwing your plywood to the wall.
These are the drywall anchors we use for everything and are way better than the plastic ones many people use.
7. Attaching the Shims
Alright, so this next part is KEY. Do not skip this step!
Working row by row, lay out your shims in a line on the ground. You’ll notice that some shims are wider than others, which is fine, but it’ll be obvious when they’re on the wall. It’s okay if your shim row gets smaller as you look down the row, but you just want to make sure the shims that will be glued next to each other are about the same width so they line up well. Also, some shims might look better on one side or the other.
One other thing to consider, will you alternate which way your shims go by row or are you going to have it all go one direction with the fatter side on the same side? I chose to alternate each row so one row has the fat side on the left and the next row has the fatter side on the right. Visually I didn’t want your eye drawn towards the hallway on the left or the garage door on the right so by alternating the rows it kept your eye focused on the wall feature.
Starting on the top row, add a line of wood glue on the back of the second shim in your row and attach it to the wall a few inches away from the edge. It’s much easier to paint/stain your shim wall after it’s up on the wall, but you don’t want to have to do the edge pieces since you’ll need to cut them down so you’re going to write which row each of the edge shims are on the back.
It’s best to start at the top in case things aren’t perfectly straight by the end it won’t be as obvious at the bottom.
Gluing is much quicker if you have a helper. One person glues, one person attaches. I found it was easiest to attach two at a time, hold them to the wall for a few seconds, and then move on to the next ones.
For your edge shims, write on the back which row it is and if it’s for the left or the right. So my first row would have 1L and 1R written on the back.
Work row by row attaching all the shims in a line. Make sure and offset each row so they don’t start at the same spot and flip the rows so the fatter side is on the opposite side if you want a similar look to what we did.
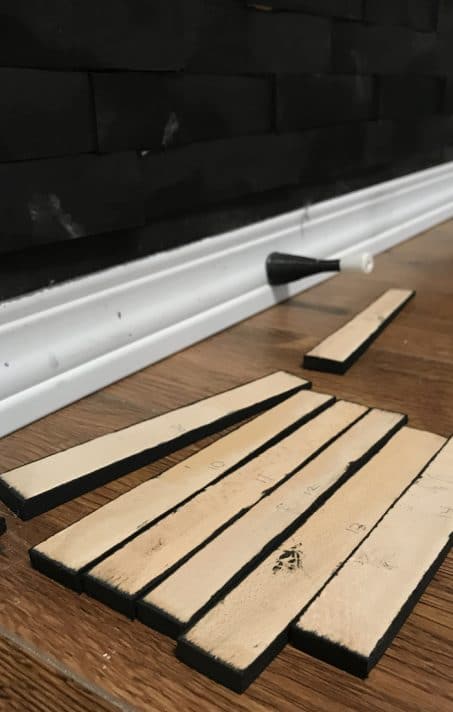
Once you get to the last row at the bottom of your wall you’ll need to decide whether your shims will need to be cut down to fit. All of our bottom row had to be cut in about half horizontally to fit on the wall above the baseboard. Mark with a pencil where each individual shim needs to be cut and make sure to number on the back each shim so you don’t have to fit it all together like a puzzle at the end.
Before attaching the bottom row of shims, you’ll want to stain or paint them first and then you can glue them to the wall.
For staining, I found it was easiest to stain two rows at a time, wipe it with a dry rag, and then do the next two rows.
8. Edge Shims
For the edges, you’ll need to align the shims next to each row and then mark where they need to be cut to fit perfectly. Cut them all down using a miter box or saw of some kind. I used a chop saw.
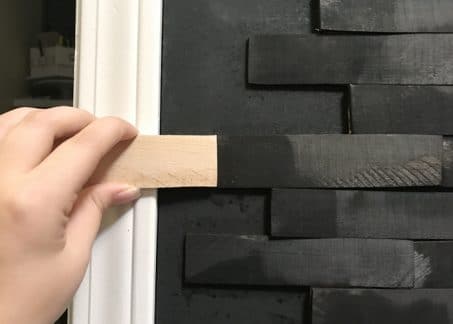
Once they’re cut, put them all in the wall to make sure they fit between the shims that are above and below them also. Once you’re sure they all fit then you can paint or stain them and then glue them up.
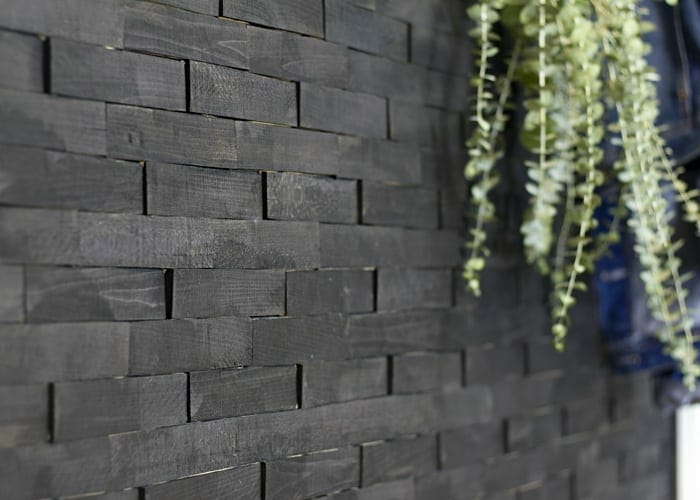
9. Finish Trim
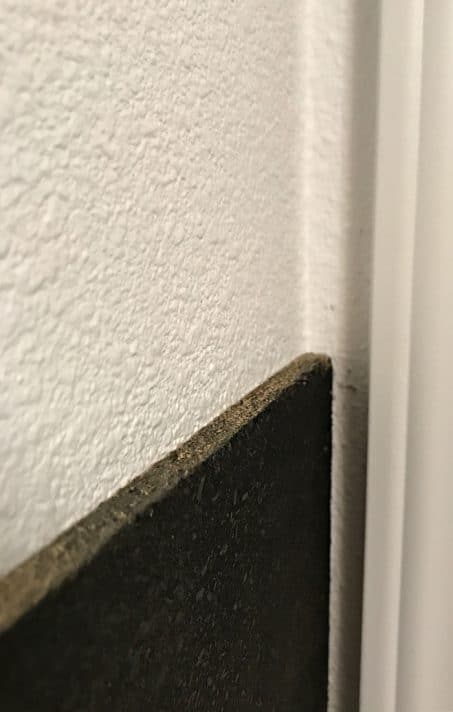
The last step is to add a piece of 1” square trim that has been stained/painted to match the wall and cut to size. This really helps give the wall a finished look.

I love how this whole wall turned out and is quite the dramatic impact when people walk into our home. See the whole industrial modern entry reveal here.
What do you think? Would you ever do something dramatic like this wood shims wall in your home?

![]()


In our kitchen I used lath boards for molding around the windows and doors. Though I also did a mini-shiplap with them too. We have two windows in the corner, where one part of the ceiling is starts sloping up in a vault. I used the lath shiplap to pull the corner together and tie into the molding. I ended up doing it for the back splash too. I found that it was easier to stain & seal the wood first then attach it to the wall (I used a staple gun and brad nails).
So using wood shims for an accent wall isn’t that much of a stretch for me to consider doing :) Yours looks amazing!
Thanks so much! I’m sure your kitchen looks awesome!
Hi Amanda,
Finally a great tutorial for an accent wall and with a video on top of that! Thank you so much! We want to do this in our entryway but with a whitewash ( as our entryway is small).
I love what you did.
Forgot to ask. What color stain did you use?
I love the color.