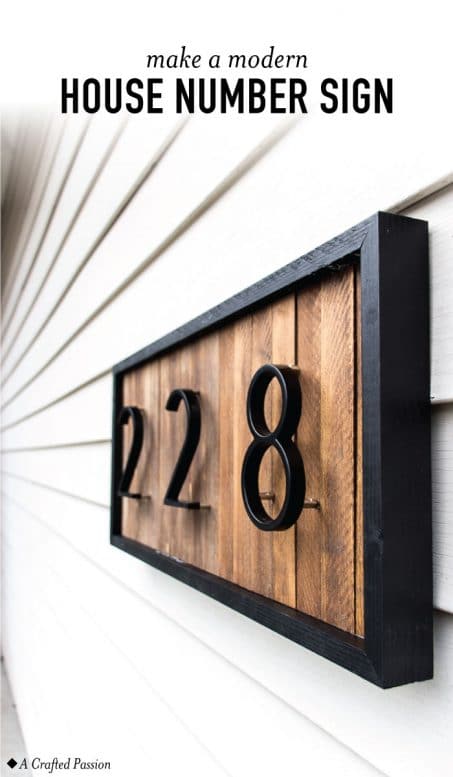
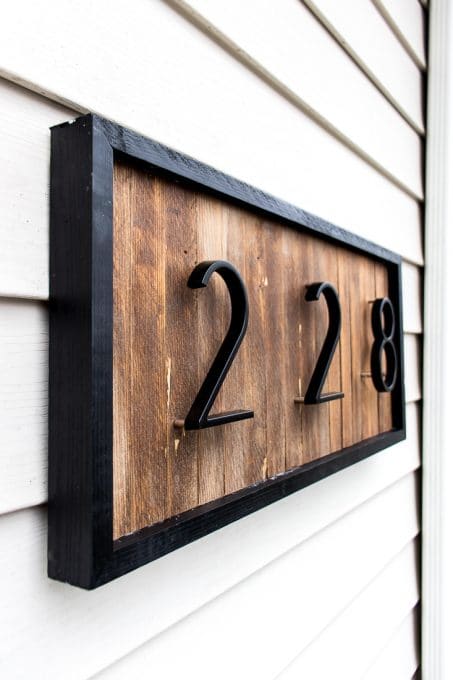
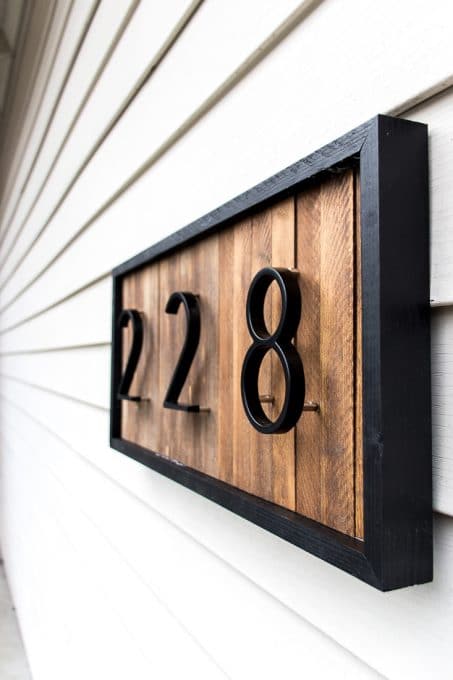
DIY a modern house number sign with wood shims to improve your curb appeal. This unique address plaque is simple to make and looks great!
We’ve been in our home for 5 years and for 5 years we have had to give people specific directions when coming to our home. We have house numbers on our home, but you can’t actually see it when you drive up to our house. Time to change that!
This week I made a modern house number sign and I love it! I had leftover wood shims from our wood shim entry wall and was able to put together this plaque to hang on the exterior where it’ll be easier to see from the road.
Let me show you how to make your own.
Craft Time: 1 hour
Waiting Time: 2 hours
Skill Level: Intermediate
Cost: ~$30 (depends on how many numbers there are in your house number)
Here’s a little video to show you how it’s done…
Materials to make a modern house number sign:
- 1/4” birch plywood
- Wood shims
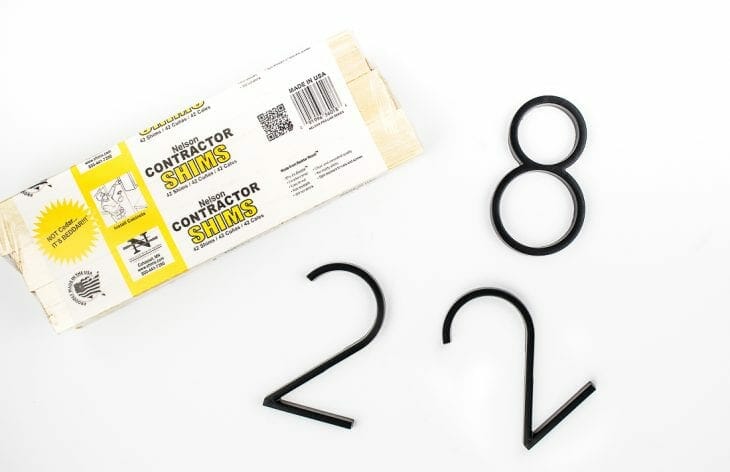
- 5″ floating mount house numbers
- 1×2 common board
- Wood stain
- Paint
Tools
- Sanding sponge
- Wood glue
- Rag
- Mallet
- Drill
- 5/32 drill bit
- Measuring Tape
- Saw
- Micropinner
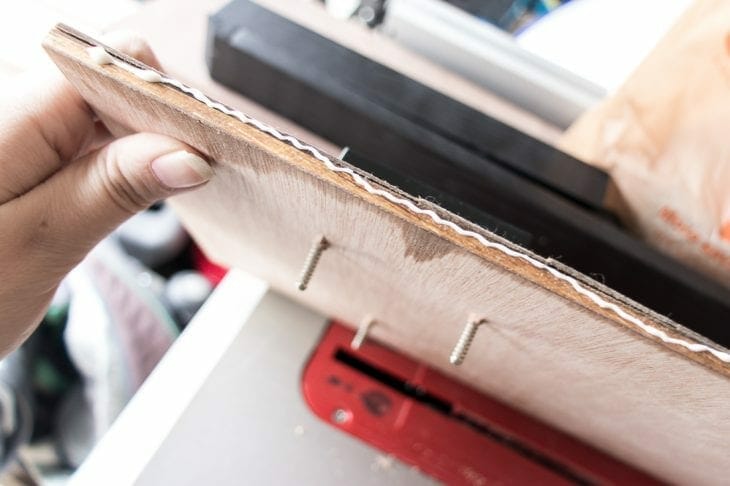
1. Cut Base
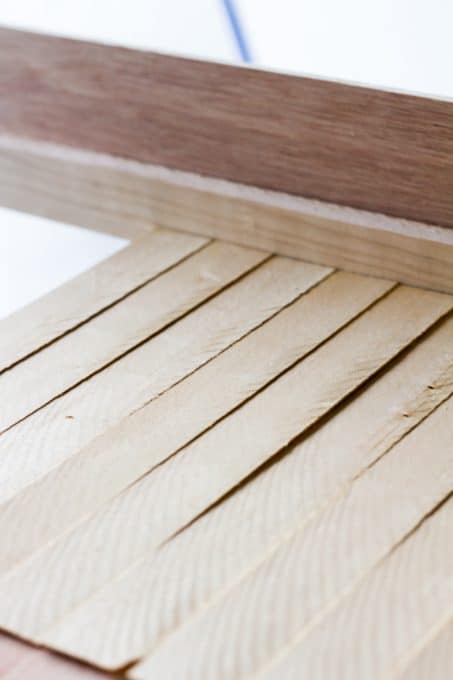
First, cut your base plywood that you will glue the wood shims to. Mine was about 15″x26″. This will get trimmed down later, so it can be a rough cut.
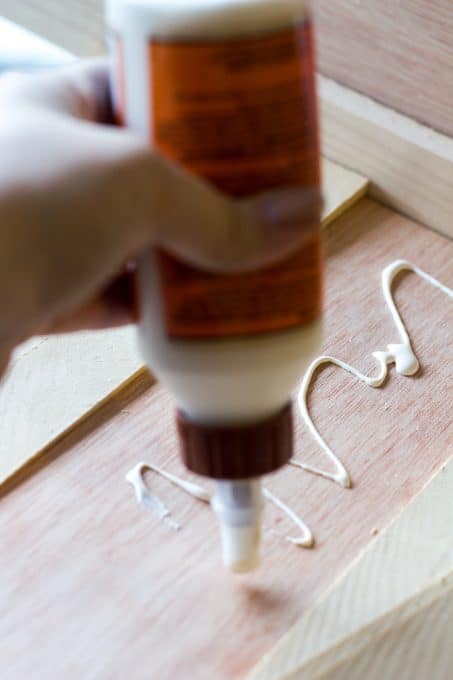
2. Glue Shims
Place your wood shims one by one next to each other with the fat edge of the shim flush with the edge of your base plywood.
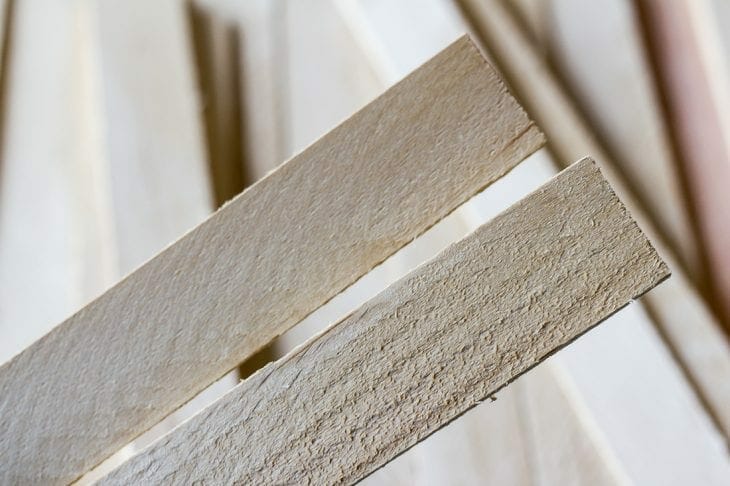
Some wood shims come a little more beat up than others so pick and choose until you have them placed the way you want. As you can see below, the bottom shim would need more work to look smooth, so if you have enough shims just set that one aside and grab a different one.
Working a few shims at a time, pick up your shims and use wood glue on the plywood to attach the shims to the board. Continue until they are all glued down.
3. Trim Edges
Once the glue has dried, run your wood shim board through the table saw to make the sides even. If you don’t have a table saw, you could also use a circular saw, band saw, or jigsaw.
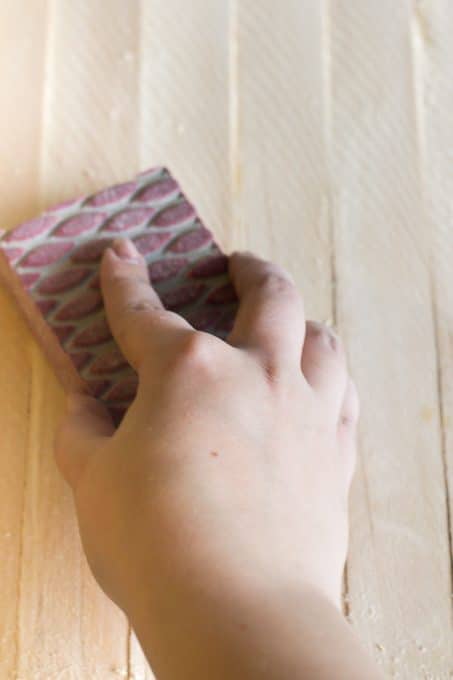
4. Sand
Sand all your edges and the top of your shims now to smooth everything out. I’m obsessed with sanding sponges and they really help get all the edges.
5. Stain
Clean off your shim board to make sure there isn’t any sawdust and then stain your board with a rag. I stained mine with some leftover golden oak stain I had from our entry bench.
6. Add Numbers
Alright, now time to add your numbers. I got these 5″ floating mount numbers off Amazon and they look great. They are made to just go directly into your exterior, but they work great for this project too.
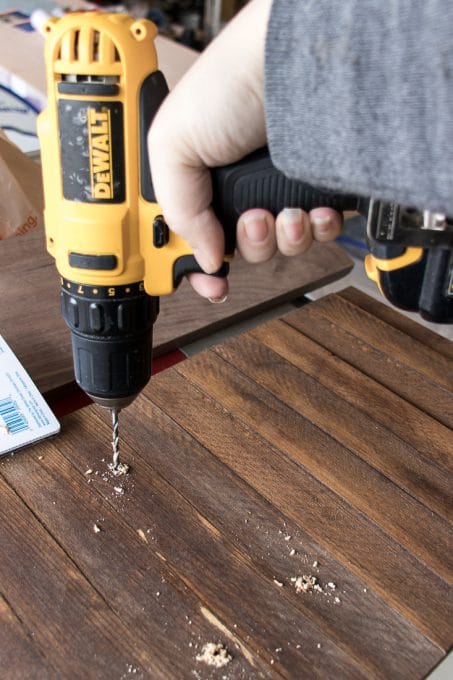
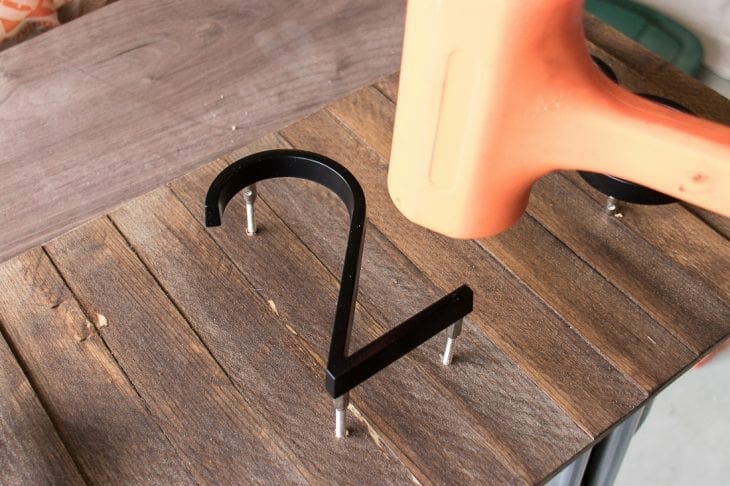
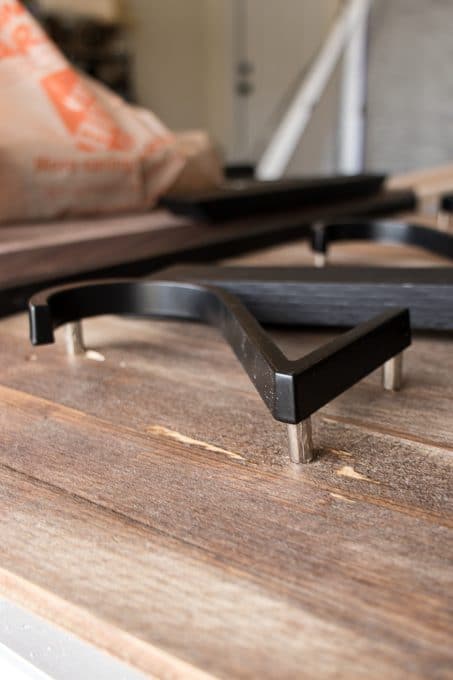
Twist the mounts onto the back of the numbers and use a measuring tape to center your numbers. Once you get them placed, put some pressure on them to mark where you will need to drill. Since we’re working with soft wood shims, it should be fairly easy to see where the holes go as you can see below.
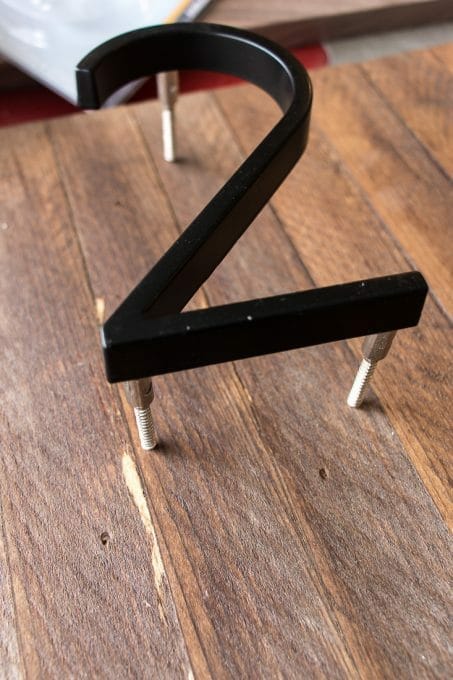
I found a 5/32 drill bit worked best for the house numbers. With a scrap board underneath the plywood, drill all your holes and then use a mallet to softly pound the number mounts evenly into the board.
Love simple, DIY projects? Grab your copy of Thrifty Ply for a limited time to learn how to create 9 projects out of just one 1/2 sheet of plywood! Get it here.
I love how they appear floating and will be easier to see from the road.
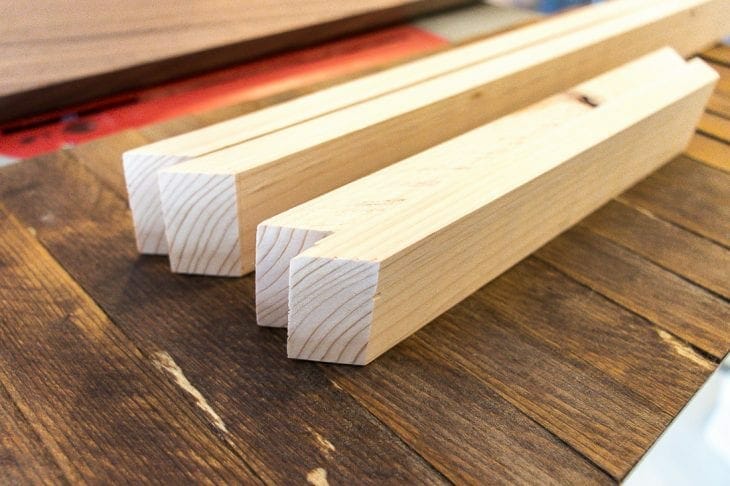
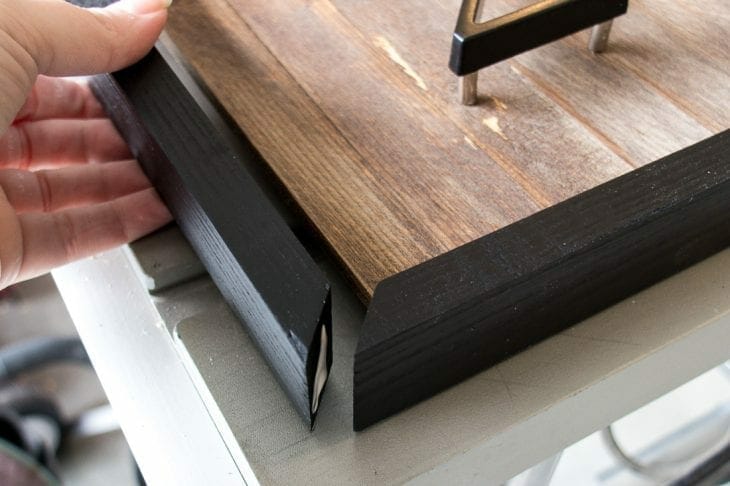
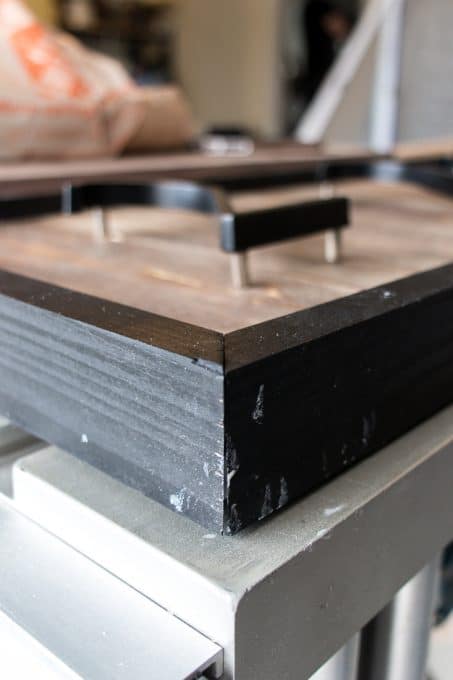
7. Miter Frame
Next up, the frame.
Since the floating mount numbers are designed to go into the exterior of your home, there is about an inch sticking out the back of the sign that we need to hide.
Take your 1×2 common board and cut your wood at 45-degree angles using a miter saw or miter box to fit perfectly around the shim board.
Sand all the edges as needed once they are cut to size and fit around the board perfectly.
8. Paint
I gave my frame pieces two coats of matte black spray paint. This is my hands down favorite matte black spray paint, but if you can’t find that one this one is a great second option.
9. Attach Frame
Now, it’s time to attach the frame. Start with the long sides. Add wood glue to the long edges and then set your shim board on a flat surface. The goal is to have your frame as far back on the board to hide the screws that are sticking out the back.
Set the side boards and then pin them on the edges and middle with a micropinner to hold it until the glue dries.
Once the long edges are pinned, you can add the end pieces with a little more glue and a pin in each corner.
If you’re a messy worker like I am and get wood glue all over, just give your frame a quick sand and touch up paint and you’re done.
10. Hang
Now, you just need to hang your house number sign. I would suggest attaching a picture hanging wire to the back of your frame and then a screw into the exterior of your house. Just be sure to silicon where the screw is to make it waterproof.
I love how this turned out and slowly but surely the exterior of our home is starting to match the look of our interior.
If you missed the door mat I shared, check it out. It turned out too cute!
Also, see that door? I hate it. Like REALLY hate it. I hate the textured glass. I hate the oval. I hate that I can’t sneak up and see who’s at my door. I hate the ornate trim work. Bleh! It’s got to go. The horrible thing is we bought a new door 3 years ago, but just haven’t figured out how/where to stain it so that we can then get it installed.
If anyone has a genius idea, I’m all ears! We need to find a clean area (or create one) so that the stain has time to cure and isn’t too cold.
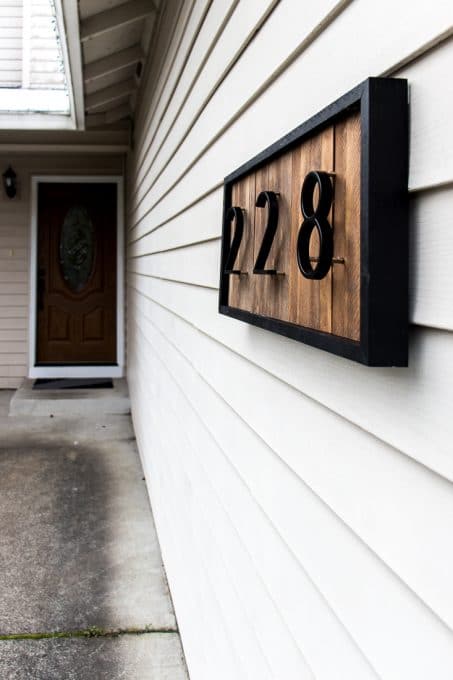
But, enough about my hate for our door. What do you think of this house number sign? I’m obsessed!! I love how it turned out and I’m even more happy I was able to use up all wood I already had.

Make a simple hanging shelf out of wood. This easy DIY idea looks great on your wall for storing little decor items in your home.

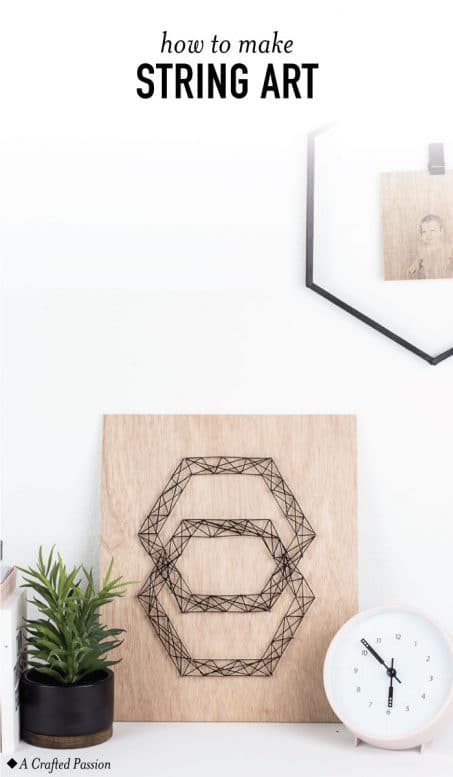
This geometric DIY string art is so easy to make with this simple tutorial and looks great on the wall. Plus, this modern hexagon design is too fun!


Love this idea. What was the finished dimensions of your full project? Trying to decide how much material to buy and what amount of space to leave around the edge of my numbers ( I have 4).
Amanda, Thanks for the sharing your tutorials. How has the house number plaque held up outdoors? Did the shims warp at all or bulge? thank you.
It’s funny you hate your door…. I have been obsessed with finding one exactly like that ever since we bought our MidMod home. It’s a treasure.
Hi Amanda, I was just wondering how this sign does in cold or wet weather? Also, what type of paint did you use and how big would it be for 4 numbers?
Thank you for this. Just completed ours today. It looks amazing.
How does this mount to the wall?