
Few things are more frustrating than waking up to a string of overnight motion alerts, only to find the culprit is a spider doing laps across your camera lens. Keeping your security cameras free of bugs, insects, and spider webs is more than a housekeeping matter; a lens obscured by webbing or insect debris means blurry footage, unreliable night vision, and a monitoring system that cries wolf so often you start ignoring it. Over time, the grime and moisture trapped by webs can also shorten equipment life.
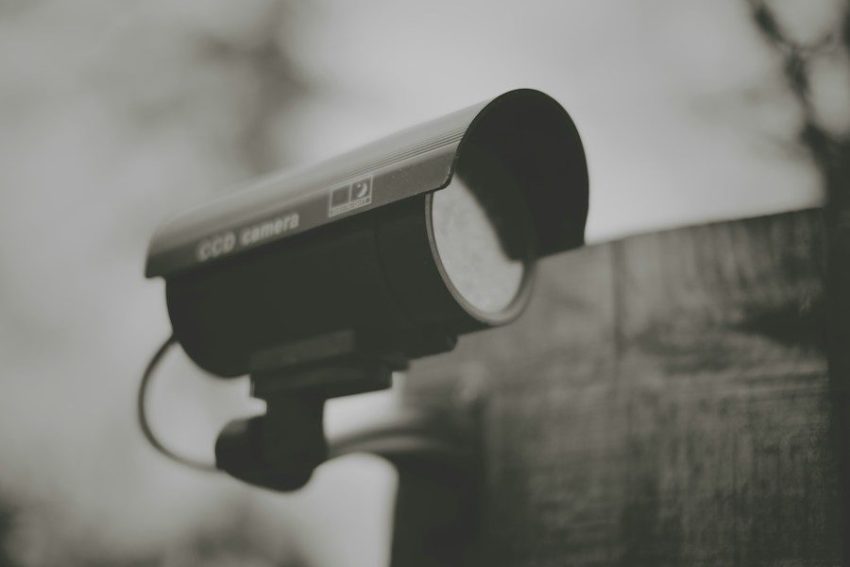
This guide gives you a camera-safe prevention and maintenance routine built around Australian conditions, from the heat and summer insect surges of Queensland to the coastal salt spray of New South Wales and Victoria. Most of the advice applies whether your cameras are part of a professionally monitored system through Smart Security or a stand-alone set-up, and the final section explains when it is worth calling in a professional rather than tackling the problem yourself.
Why insects and spiders love outdoor security cameras
The root cause is light. Most outdoor cameras use infrared LEDs for night vision, and many also have visible status LEDs or integrated floodlights, which effectively turn the camera into a lit-up feeding station after dark. Spiders follow the prey; as one entomologist has noted, they build their webs where the insects are, detecting light even with relatively poor vision. The camera itself is not the target — the insects it attracts are.
Placement makes the problem worse. Cameras mounted directly beside porch lights, under always-on floodlights, or near door frames where indoor light spills outside sit in an insect flight path all evening. Some camera housings and metal brackets also retain warmth from the sun or from the electronics inside, drawing insects independently of the light. The result is webs strung across the lens, spiders or moths crawling close enough to trigger motion alerts, and IR light bouncing back off the webbing to produce the characteristic white haze in night-mode footage.
In Australian conditions these pressures are amplified. Insect activity spikes sharply in late spring and throughout summer, particularly after rain, and cameras in coastal suburbs face the added complication of salt-laden air, while those in leafy or bushland settings deal with higher spider and moth populations year-round. All of which means the issue needs active management, not just a one-off clean.
Smarter positioning and settings to reduce bugs from day one
The best time to address this problem is at installation, because the positioning choices made then will either reduce insect traffic or entrench it. Where possible, separate lights and cameras by at least a metre or two; a porch light can illuminate the area you want to monitor without being mounted directly beside the lens that insects will then swarm. Avoid mounting cameras in enclosed corners where there is no air movement, since a gentle breeze disrupts web-building, and offset brackets that hold the camera slightly away from the wall also deny spiders the sheltered, stable anchor points they prefer.
Housing choice matters too. Cameras with smooth, weather-rated exteriors and minimal crevices give spiders fewer places to anchor silk. A sunshield or visor over the lens provides some physical protection from insects approaching head-on and reduces how far the IR LEDs radiate outward.
Once the camera is in place, spend ten minutes in the app reviewing three settings. First, reduce overall motion sensitivity so that tiny movements at close range are less likely to trigger a clip. Second, draw your activity zone to exclude the immediate foreground directly in front of the lens, where webs tend to form, and focus the monitored area on the path, driveway, or entry point you actually care about. Third, enable smart or AI-based alert filters if your camera supports them; person and vehicle alerts let you mute the catch-all motion notifications that a moth or a swaying web would otherwise generate all night.
For cameras with controllable IR or white LEDs, consider dimming the output or scheduling the floodlight to activate on motion only rather than running all night. Less light means fewer insects, and fewer insects means fewer spiders. Smart Security’s installation team builds these decisions in from the outset, choosing cameras and positions that reduce bug-related problems before they begin.
A safe, step-by-step routine for cleaning cameras and housings
A quick glance at your live view once a week will tell you whether the image has become hazy or streaky, and a spike in overnight alerts is often the first sign that something is on or near the lens. Plan a physical inspection and light clean at least every two to three months, and do an immediate check after any significant storm. In Australian summer, monthly cleaning is realistic for cameras in high-insect locations.
Before you start, gather the right tools: a soft microfibre cloth, a small soft-bristled brush or a clean dry paintbrush, a can of compressed air or a manual hand blower, and a mild lens-safe cleaner or a very small amount of pH-neutral detergent diluted in water. If the camera requires a ladder, place it on firm, level ground and have another adult hold it steady. Do not lean out over balconies or roofs to reach a camera; if you cannot reach it safely from a stable position, stop and call a professional. For hard-wired cameras, keep all liquids well away from cabling, junction boxes, and cable entry points, and do not open sealed housings or remove weatherproof covers, since they are designed to stay closed.
The cleaning sequence is: brush first, blow second, wipe last. Use the soft brush to sweep loose webs and insect debris off the housing, bracket, and the wall or eave immediately around it, then follow with compressed air to clear dust from crevices without touching anything. Only then wipe the lens gently with the microfibre cloth, using a tiny amount of lens-safe solution if there is a smear or residue, and dry with a second clean cloth to prevent streaking.
Do not use glass cleaner containing ammonia, methylated spirits, acetone, abrasive pads, paper towel, or a high-pressure washer anywhere near the camera. These products damage lens coatings, seals, and plastics, and in some cases will void your warranty. After cleaning, run a short test recording and check the night-mode view to confirm there are no streaks or residue showing up under IR illumination. If the camera is hard to reach safely, Smart Security can arrange routine servicing as part of their support offering.
Keeping your security cameras free of bugs, insects, and spider webs with low-tox deterrents
The goal here is narrow: discourage insects and spiders from treating the camera as home base, without putting anything on the device that could smear the lens, degrade seals, harm native wildlife, or leave a residue that attracts more dust and grime than the original pest. Start with physical methods, because they carry no chemical risk at all. Knock down any webs with a soft brush each time you inspect the camera, trim back plants, vines, and shrubs that touch or overhang the housing since these are natural highways for spiders, and avoid positioning cameras directly above outdoor bins or right beside garden lights, both of which are insect magnets.
For chemical deterrents, the key rule is: around the camera, never on it. A light application of an outdoor-safe insect barrier spray on the wall or mounting surface, a short distance from the camera body, can reduce crawling insects approaching from the structure. Apply it only to the surrounding surface, well clear of the lens, any vents, and cable entries, and follow Australian label directions carefully, particularly if you have pets or are in a native-wildlife-sensitive area.
Several popular home remedies are worth avoiding. Products such as petroleum jelly, silicone spray, Teflon spray, or Vaseline applied to the housing may make the surface slippery, but in Australian summer heat they run, attract dust, and can work their way toward the lens or seals over time. Sticky or oily coatings should not go on any camera unless the manufacturer has explicitly approved it. Dryer sheets attached with rubber bands trap moisture and debris, and the rubber band can mark or stress the housing. Flea collars looped around cameras introduce chemicals close to electronics and vents where they do not belong.
The broader environment can do a lot of the work. Switching external lights to warm-white or amber globes, which are less attractive to insects than cool-white LEDs, and putting all outdoor lights on timers or motion sensors rather than running them all night, reduces the insect traffic that draws spiders in the first place. If one camera location proves persistently problematic, relocating it even half a metre away from a light source can make a significant difference. Smart Security’s technicians can advise on camera and lighting layouts, and on replacing older units whose IR output or housing design makes them particularly prone to insect accumulation.
An Australian-friendly maintenance schedule and when to call in a professional
A simple schedule is easier to stick to than a long checklist. Once a week, pull up your live view for thirty seconds and look for haze, smearing, or an unusual number of overnight alerts. Every two to three months, do a physical inspection: brush the housing, blow out crevices, wipe the lens, and check that brackets are secure and cables are undamaged. In late spring and through summer, shift to monthly physical cleans for any camera in a location with heavy moth or spider activity.
Seasonal preparation also pays off. Before summer arrives, clear vegetation from around all cameras, inspect housings and seals for any cracking caused by the previous season’s heat, and revisit your motion-zone and alert settings to make sure they are still calibrated sensibly. During summer, check night-mode footage more frequently for IR glare, which is the first sign that a web has formed close to the lens. After heavy rain, wind, or a storm, inspect for shifted brackets, water spots on lenses, and new webs taking advantage of disturbed surroundings.
A few Australian-specific factors are worth keeping in mind. Sustained heat can soften some housing sealants over several seasons, so inspect seals annually and flag any cracking to a professional before water ingress becomes an issue. In coastal areas, wipe salt residue from lenses and housings more frequently, since salt is mildly abrasive and accelerates wear on coatings. In bushfire-prone zones, keep dry leaf debris and bark away from camera brackets and cabling as part of standard property maintenance.
Some signs indicate that DIY maintenance is no longer the right answer: persistent false alerts even after thorough cleaning and app adjustments, cameras that regularly lose focus at night, visible damage to housings or cables, or camera positions that cannot be reached safely with a domestic ladder. At that point, it is worth contacting Smart Security for a professional assessment. Their technicians can audit existing cameras, recommend better-suited or upgraded units with improved IR management and more insect-resistant housings, reposition cameras in persistently problematic spots, and ensure that monitored systems flag obscured or degraded views before they become a security gap. Set a reminder now for your first full clean and settings review, then reach out to Smart Security if the problem persists or the cameras are beyond safe DIY access.