Our dining room in our new home is almost complete but I am having a heck of a time finding curtains I like and just couldn’t wait to show you what we have done so far in this room! So let me present to you our new and improved dining room!

First, I started with this hideous lovely dining room set that I found on Craigslist 4 years ago for $100. It was a nice bronze color with some nasty, stained, flowery seat cushions that just didn’t fit the feel of our new home.
So I started with some supplies. Here is what I ended up using on this project:
- 2 cans of spray paint
- Seat cushion fabric (bought mine at Joann’s Fabric)
- Foam
- Staple gun (filled with staples would be preferred)
- 2-4 hands ideally for stapling and pulling
We started by unscrewing the seat cushions so we had just the frame to work with. I bought a indoor/outdoor black spray paint from home depot and for the next week spent my evenings spray painting my life away….and my garage floor in a giant box torn apart that our patio furniture came in. At least there’s one plus to having so many spare boxes laying around after a home move.

While chairs dried, I began working on the seat cushions. I recruited mr g to pull out staples from the bottom of the cushions and threw everything away except the wood bottom. I then layered foam to the desired cushiess we wanted. We tend to sit around the table for hours when family is over so went for the more cushier route. I then cut the fabric to wrap around the wood and foam with a few inches on each side to spare.

I layered it all as it should be with the help of mr g and began pulling and tugging to get the fabric cover on right. Now, we chose a tricky fabric because it has vertical lines that would look silly if not straight, however, if you buy a more flexible design, this should be a super easy process. While my husband held the fabric down, I stapled one middle section to get started and then we began working out way around the cushion. Like I said, 2-4 hands is ideal because of this.

When you get to a corner, just do your best to eyeball it and pull and tug until it aligns well. I don’t like the look of a clean line fold on corners so he would gather it and then I would staple the heck out of the corner…and then we moved on to the next.


Here’s what a finished stapled corner looks like prior to cutting the excess fabric.

Once all the fabric is stapled on to the bottom, flip it over and check for any wrinkles or bumps. If you pull the fabric too tight or not consistent throughout, it can make the cushion look lumpy so double check that you don’t have anything funky going on.

Once you are satisfied with the cushion, cut the excess fabric away so that you don’t have extra fabric hanging down once the chair is put together for the dog, or babies, to pull at.


Last step was is to put it all together. Screw in the cushion and stand back to admire your beautiful, like-new chair!

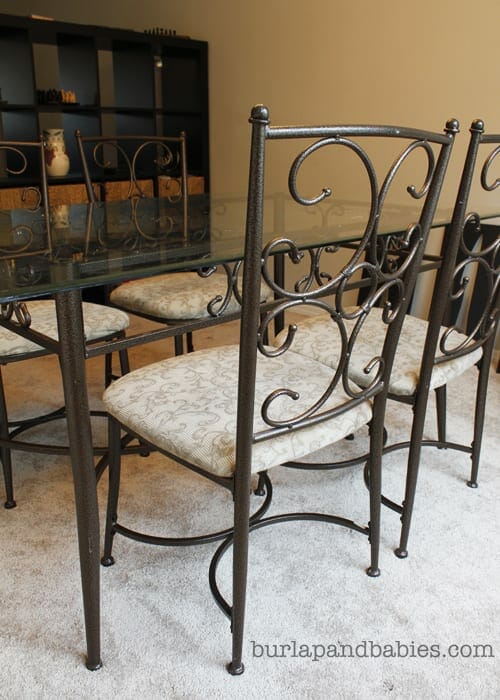
I love the details of this table set so much more now that it fits in with our home and the cushion definitely adds more of a modern feel with the traditional scroll design.

And now what you’ve all been waiting for, the final look! Of course, we had to add our giant utensils (tutorial here) to the wall and now we are just waiting for some curtains and we can call this room complete!
