Upgrading your shed with a ramp can prove to be a valuable and practical experience. It is also a great addition to your home. It simplifies moving heavy garden machinery and other heavy equipment in and out of your shed. This is especially true if the shed is not easily accessible or if you have mobility issues.
There are some things to consider when building a shed ramp, including the materials you will use, the ramp’s slope, and overall design. Don’t worry – before the end of this post, you’ll know more about them.
Watch this Video Summary
How to Build a Ramp for a Shed
To learn more, follow this step-by-step guide on how to build a ramp for a shed:
Gather Required Measurements
The size of the ramp depends on the size of your shed and what you’ll be moving in and out of it. The slope of the ramp should be gentle enough to allow for easy access but not so steep that it becomes difficult to navigate.
The rule of thumb is to aim for a slope of 1:12, meaning the ramp should be 12 inches long for each one-inch rise of ramp angle.
Determine the Best Material
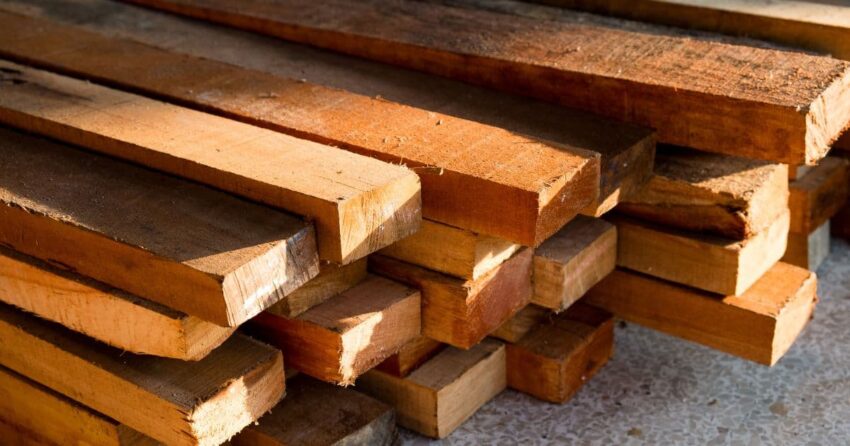
You can use several materials to build a ramp for your shed, including wood, concrete, and metal. The most common and affordable option is a wooden ramp, but wooden ramps can rot over time and require regular maintenance.
Concrete is another durable option for a longer ramp life, but it is also more expensive and requires a lot of work to install. Metal ramps are solid and long-lasting but noisy and may stand out aesthetically from the rest of your shed.
If the cost or maintenance of a wood or metal ramp bothers you, there are other materials you can consider using. For instance, some recycled plastic or composite materials are strong, durable, and low maintenance. These materials may be more expensive upfront, but they can save you money in the long run by requiring less maintenance and lasting longer.
Determine the Area for the Ramp
Next, use a tape measure to determine the distance from the ground to the shed’s door. You should also do this to gauge the length and width of the ramp. A coat of deck paint, stakes, and string can help you mark the area where you’re building the ramp.
Take Care of the Marked Surface
Prepare the soil where you’re building the ramp. This involves leveling the ground and removing debris, rocks, and objects that threaten to interfere with the smooth construction of the ramp.
Cut the Materials for the Ramp
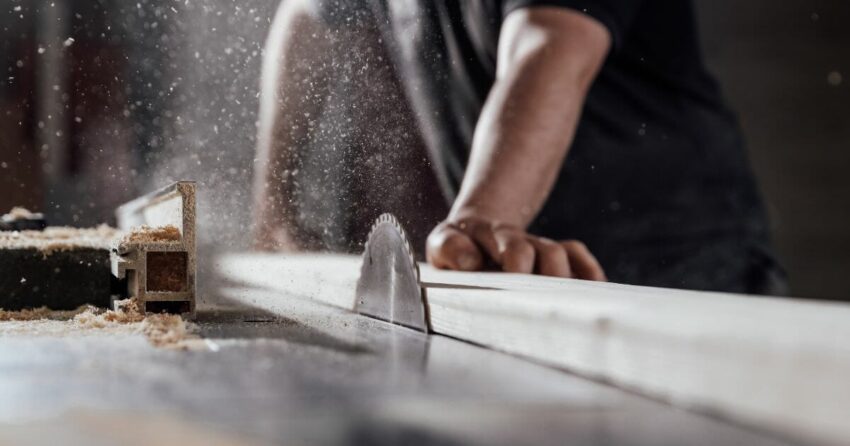
If you are using wood to build your ramp, use a saw to cut the boards to the desired length and width. If you use metal or concrete, ask the seller to pre-cut the material to the desired size.
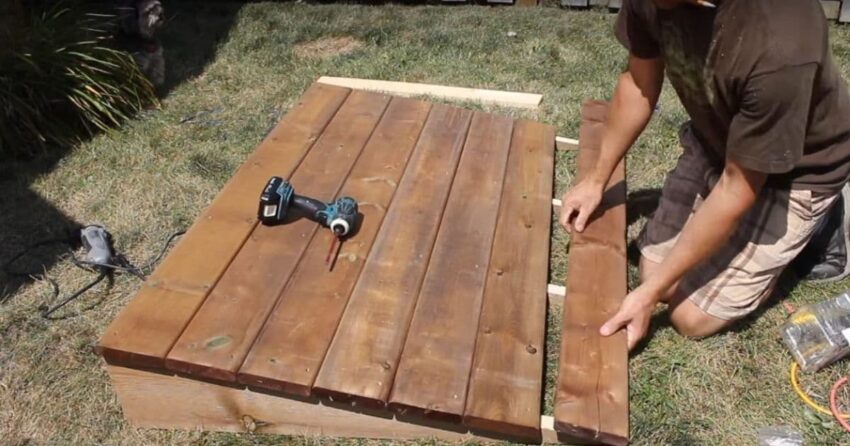
Assemble the Ramp
If you use wood, attach the boards using galvanized screws or nails. Ensure you’re using screws long enough to hold the ramp’s weight and the things you’ll be moving on it. If you choose to use metal or concrete, you must follow the manufacturer’s instructions for assembling the ramp.
Fix the Handrails
When building a ramp for a shed that people with mobility issues will use, don’t forget to install handrails for added safety. Handrails can be made from wood, metal, or PVC piping and should be attached to the ramp using screws or bolts.
Complete the Ramp
After assembling the ramp and installing the handrails, add final touches like a non-slip surface or a coat of anti-slip paint to match the shed.
Test the Ramp
Before you start using the ramp, test it to ensure it is safe and stable. Walk up and down the ramp slowly and adjust the slope or handrails if needed. If there’s any wobbling or instability, the ramp may require additional support or adjustment to be more secure.
Maintain the Ramp
Regular maintenance will help you keep the shed ramp in good condition. You may need to clean the ramp, tighten loose screws or bolts, and check for any damage or wear and tear.
If you notice any problems with the ramp, address them as soon as possible to avoid accidents or injuries.
When using a shed ramp, use caution when moving heavy items. Use a dolly or hand truck to support the weight and have someone else assist you if possible. You should also wear protective gear like gloves and safety glasses to help prevent injuries.
Essential Things to Consider When Building a Ramp for a Shed
Here are some important considerations when building a ramp for a shed:
Why You’re Building a Ramp
Why do you need a ramp for your shed in the first place? This is a question you determine for yourself before you start building.
Is your shed for personal use, or do you have commercial plans for it? Is it for moving heavy equipment or for easy access for people with mobility issues? Understanding the purpose of your ramp will help you determine the size, slope, and materials you will need.
The Weight and Size of What You’re Moving
This will help you determine the width and slope of the ramp and the materials you will need to use. If you are transporting large, heavy objects, you will need a broader and sturdier ramp with a gentler slope.
The Location and Layout
Where you’re building your ramp, knowing your location and planning your layout is essential because those factors determine the ramp’s slope and length. If your shed is on a slope, it’s best to level the ground or build a ramp with a steeper slope.
If your shed is on flat ground, your ramp can have a gentler slope. Also, consider the layout or survey of your property and the surrounding area to ensure that the ramp does not obstruct access or create any other issues.
The Ideal Materials
The materials you choose for your ramp will affect its durability, stability, and cost. Some common materials for ramps include wood, metal, and concrete. Wood is a popular choice for ramps because it is relatively inexpensive and easy to work with.
However, it is not as durable as some other materials, and it can sometimes require more maintenance. Metal ramps are more durable and require less maintenance but are more expensive.
Concrete ramps are the most durable and long-lasting but are also expensive.
Safety
Safety is an essential factor to consider when building a ramp for your shed. The slope of the ramp should be manageable because it can make it challenging to navigate and increase the risk of falls.
You can also put handrails on both sides to provide additional support and stability. Also, ensure the ramp is well-lit, especially if you’ll ever use it at night.
Finally, remember to check the ramp for any damage or hazards regularly.
Local Building Codes and Regulations
Before building a ramp for your shed, get familiar with local building permits, codes and regulations. Building codes sometimes provide specific requirements for the slope, width, and materials of the ramp, alongside any other conditions you need to follow.
Failing to follow these codes and regulations can result in fines and other penalties, so do your research and ensure that your ramp meets all requirements.
The Cost of Building a Ramp
The cost of building a ramp for your shed depends on the materials you choose, the ramp’s size, and the project’s complexity. Wood ramps are generally the most affordable option, followed by metal and concrete ramps.
Building the ramp yourself helps you save, but note that it may require common tools and equipment, as well as time and effort. If you are not comfortable with DIY projects or need to gain the necessary construction background and skills, consider hiring a professional to build the ramp for you.
Maintenance
Like any other outdoor structure, a ramp for your shed requires regular maintenance to ensure that it remains safe and functional. This may include cleaning the ramp, checking for damage or hazards, and making necessary repairs.
The maintenance requirements will depend on the materials you use and the ramp’s location. Wood ramps need more maintenance than metal or concrete ramps because they are more susceptible to rot, warping, and other issues.
The Aesthetics of Your Ramp
While the function of a ramp is an essential factor to consider, you may also want to think about the aesthetics of your ramp. A well-designed and attractive ramp can enhance the appearance of your shed and property.
You can choose materials and colors that match the style of your shed and surrounding landscape, or you can add decorative elements like handrails or lighting to make the ramp more visually appealing.
If you need a ramp for your shed but are concerned about the cost, you may be able to find funding options to help cover the expenses.
There are many organizations and programs that provide funding for ramps and other accessibility modifications, including local government agencies, non-profit organizations, and disability advocacy groups. You may also be able to find grants or low-interest loans to help with the cost of building a ramp.
Materials Needed for Building a Ramp
To build a ramp for a shed, you will need the following materials:
Lumber: You will need 2×4 or 2×6 lumber for the ramp’s frame. The length of the lumber will depend on the size of the ramp you are building.
Decking: Decking boards are essential for covering the top of the ramp. They can be made of wood, composite, or metal. The type of decking you choose will depend on your budget and the intended use of the ramp.
Screws and nails: Screws will help secure the lumber and decking. You should also consider some nails for securing the decking to the frame.
Concrete: This is for building the ramp on a concrete base. It should be noted that you may need concrete screws to anchor the ramp to the ground.
Other optional materials: Depending on your design, you may need additional materials such as handrails, brackets, and flashing to finish the ramp.
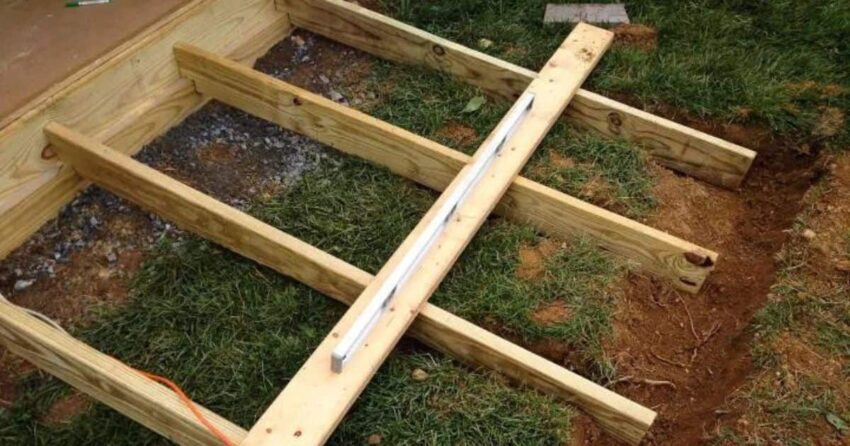
How to Anchor the Ramp to the Ground
To anchor the ramp to the ground, you will need to pour a small concrete slab at the base of the ramp. First, dig a hole where the ramp will be located. The predrilled hole should be slightly larger than the slab you will be pouring.
Next, mix the concrete according to the instructions on the bag, and pour it into the hole. Use a trowel to smooth the surface of the concrete, and let it cure for at least 24 hours before attaching the ramp.
To attach the ramp to the concrete slab, use galvanized metal brackets and screws. You should space them evenly along the length of the ramp, and the screws should be long enough to go through the thickness of the lumber and into the concrete.
How to Build a Ramp Without Anchoring it to the Ground
If you do not want to anchor the ramp to the ground, you can build it using a freestanding design. To do this, you will need to use posts to support the ramp.
First, measure and cut the lumber to the desired length for the ramp. Next, cut four posts to the desired height. You will use these posts to support the ramp.
To build the ramp, attach the ramp boards to the posts using screws. Make sure to space the boards evenly and use enough screws to ensure a secure connection.
Once the ramp is assembled, use gravel to create a stable base for the ramp. Spread a stone layer around the ramp’s bottom and tamp it down to create a firm foundation.
How to Make the Ramp Safe to Use
There are several things you can do to make your ramp safe to use:
- Use a non-slip surface: Cover the surface of the ramp with a non-slip material, such as rubber or textured paint, to prevent slipping.
- Use handrails: Consider installing railings on both sides of the ramp to provide support for users. The bars should be at a height of 36-38 inches and should be securely anchored to the ramp.
- Maintain the ramp: Regularly inspect the ramp for loose screws, splintered wood, or other hazards, and make repairs as needed.
- Use caution when using the ramp: Always use caution when using the ramp, especially if it is wet or slippery. Take your time and use the handrails for support if needed.
- Consider adding lighting: If the ramp is located in a poorly lit area, consider adding lighting to make it easier to see. This can be especially important for those with vision impairments.
Final Note
Learning how to build a ramp for a shed will save you tons of money. Although a professional is a professional for a reason, the tips and tricks we’ve considered in this blog post will leave you with a safe and professional-looking ramp in no time.