Making your own skincare products is one of the most rewarding DIY projects you can try. I started making my own body butter a few years ago when I noticed my skin getting dry during the winter months. Store-bought lotions just were not cutting it for me, and I wanted something richer and more natural. Since then, I have fallen in love with the process of mixing simple ingredients to create something luxurious for myself and my family.
This project is perfect for anyone who wants to know exactly what they are putting on their skin. You do not need a chemistry degree or a fancy lab to whip up a batch of moisturizing goodness. In fact, you probably have some of the tools in your kitchen already. I am going to walk you through everything you need to know to make the fluffiest, most hydrating body butter right at home.
Why You Should Make Your Own Body Butter
Complete Control Over Ingredients
Avoiding Harsh Chemicals
When you look at the back of a lotion bottle from the store, the ingredient list is often a mile long. Many commercial products contain preservatives and artificial fragrances that can irritate sensitive skin. I love making my own skincare because I can leave all of that junk out. You get to decide exactly what goes into your mixture, which gives you total peace of mind.
Creating your own blends means you can stick to natural, skin-loving ingredients. You never have to worry about hidden parabens or synthetic dyes when you are the one holding the mixing bowl. It feels great to use a product that is pure and safe for the whole family, including little ones with delicate skin.
Customizing Scents
Another huge benefit is the ability to create your own signature scents. Maybe you love the smell of vanilla, or perhaps you prefer something fresh like peppermint or lemon. When you make body butter at home, you are the boss of how it smells. You can mix and match essential oils to create a fragrance that fits your mood perfectly.
I often change the scent of my body butter depending on the season. In the winter, I might go for warm spices like cinnamon and clove. In the summer, I stick to light florals or citrus notes. This level of customization is something you just cannot get from a generic bottle on a supermarket shelf.
Cost-Effective Skincare
Saving Money Long Term
High-end body butters can be incredibly expensive, sometimes costing upwards of thirty or forty dollars for a small jar. When you break down the cost of the raw ingredients, you realize that making it yourself is much cheaper. A bag of shea butter and a jar of oil will last for many batches, bringing the cost per jar down significantly.
I used to spend a small fortune on fancy creams, but now I save that money for other things. Once you buy your initial supplies, they last a long time. You can make enough body butter for yourself and your friends for a fraction of what you would pay at a beauty counter.
Bulk Buying Benefits
Buying your ingredients in bulk is a smart way to save even more money. Suppliers often offer discounts when you purchase larger quantities of butters and oils. This is great if you plan on making gifts or if you go through a lot of moisturizer like I do.
I usually buy my main ingredients in one-pound or five-pound bags. It might seem like a lot at first, but since these ingredients have a long shelf life, they won’t go to waste. You will always have supplies on hand whenever you feel like whipping up a fresh batch.
What You Need to Get Started
The Main Butters and Oils
Shea Butter Basics
Shea butter is the star of the show for most whipped body butter recipes. It is incredibly moisturizing and has vitamins that are great for your skin. I prefer using unrefined shea butter because it retains more of its natural nutrients, though it does have a nutty, earthy smell.
If you are not a fan of the natural scent of shea butter, you can opt for refined shea butter instead. It is white and odorless, making it a blank canvas for your essential oils. Either way, this butter provides the solid base that gives your final product its creamy texture.
The Role of Coconut Oil
Coconut oil is the second most important ingredient in this recipe. It melts on contact with your skin and absorbs quickly, providing deep hydration without feeling too heavy. I always suggest using high-quality oil for the best results in your skincare routine.
You want to make sure you get a product that is pure and organic if possible. I recommend getting your coconut oil from this website because it works beautifully in this recipe and gives the butter a smooth finish. Having a reliable source for your base oils makes a huge difference in how your final product turns out.
Tools for the Job
Mixing Bowls and Mixers
You will need a heat-safe bowl to melt your ingredients and a separate large bowl for whipping. I like using a glass Pyrex bowl for melting because I can set it over a pot of simmering water. For whipping, a stainless steel bowl is my go-to choice because it helps the mixture cool down faster.
An electric hand mixer or a stand mixer is non-negotiable for this project. You need mechanical power to whip air into the oils to get that fluffy texture. Trying to do this by hand with a whisk would take forever and probably leave you with a very sore arm.
Spatulas and Jars
A good silicone spatula is essential for scraping down the sides of the bowl. You want to make sure every bit of oil gets whipped evenly so you do not end up with lumps in your butter. I keep a dedicated spatula just for my skincare projects so it doesn’t smell like last night’s dinner.
For storage, you will need clean jars with tight-fitting lids. Glass jars are the best option because they don’t absorb scents and look very elegant. Mason jars or recycled jam jars work perfectly fine if you want to keep things simple and eco-friendly.
My Favorite Whipped Body Butter Recipe
Preparing Your Mixture
Measuring Everything Out
The standard ratio I use is roughly 60% solid butter to 40% liquid oil. You can adjust this slightly, but sticking close to this formula ensures the butter whips up well and stays stable. I usually start with one cup of shea butter and half a cup of coconut oil.
It is helpful to have everything measured and ready before you start heating. This mise-en-place approach prevents you from scrambling for ingredients while your oils are hot. I lay everything out on my counter so the process goes smoothly from start to finish.
Melting Gently
To melt your ingredients, you should use a double boiler system. Place your heat-safe bowl over a pot of simmering water, making sure the bottom of the bowl does not touch the water. This gentle heat prevents the shea butter from becoming grainy, which can happen if it gets too hot.
Stir the oils occasionally as they melt. You want them to turn into a clear golden liquid. Once everything is completely melted, remove the bowl from the heat immediately. Do not let it boil or sizzle, as high heat can damage the beneficial properties of the oils.
Whipping It to Perfection
Cooling Down First
This is the part where patience is key. You cannot whip hot oil. You need to let the mixture cool down until it is semi-solid. I usually put my bowl in the fridge for about 20 to 30 minutes. You will know it is ready when the edges start to harden but the center is still somewhat soft.
If you try to whip it while it is liquid, nothing will happen. If you let it freeze completely solid, it will be too hard to mix. finding that sweet spot where it looks like soft wax is the secret to getting a light and airy texture.
The Whip Stage
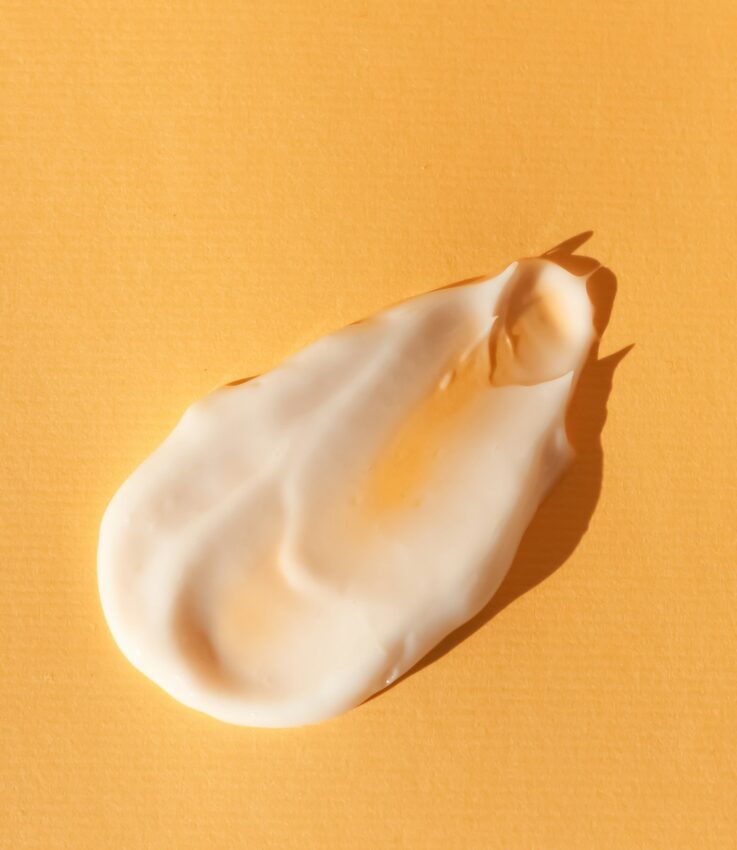
Now comes the fun part. Grab your electric mixer and start whipping at high speed. At first, it will look like a slushy mess, but keep going. After a few minutes, the mixture will start to turn white and increase in volume.
Continue whipping for at least five to ten minutes. You want it to look like whipped cream or frosting. The more air you whip into it, the lighter it will feel on your skin. Stop every now and then to scrape the sides, then keep mixing until stiff peaks form.
Customizing Your Body Butter
Playing with Scents
Floral Notes
Floral scents are classic and make your body butter feel very spa-like. Rose, jasmine, and lavender are wonderful choices that most people enjoy. I find that floral scents are particularly relaxing to use after an evening shower before bed.
You do not need to use too much essential oil. A little goes a long way. Start with ten drops for a standard batch and add more if you like it stronger. Remember that the scent might settle a bit after the butter hardens, so a slightly stronger scent initially is okay.
Fresh Citrus Blends
If you need a morning pick-me-up, citrus oils are the way to go. Sweet orange, lemon, and grapefruit smell incredibly fresh and happy. These scents are great for waking up your senses and starting the day on a positive note.
Be careful with some citrus oils if you plan to go out in the sun immediately, as some can be phototoxic. However, sweet orange oil is generally considered safe. I love mixing orange with a hint of vanilla for a creamsicle-inspired body butter.
Adjusting the Texture
Making It Lighter
If you find that the standard recipe is too heavy or greasy for your liking, you can add a secret ingredient. A teaspoon of arrowroot powder or cornstarch added during the whipping phase helps cut the grease. It gives the body butter a more matte finish and helps it absorb faster.
I almost always add arrowroot powder to my batches now. It makes the final product feel much more professional and luxurious. You do not feel the powder at all; it just makes the application feel silky smooth.
Making It Thicker
On the other hand, if you want a thicker balm for really dry areas like elbows and heels, you can increase the amount of shea butter or add beeswax. Beeswax will make the final product harder and more protective. This is great for winter recipes when your skin needs an extra barrier against the cold.
To add beeswax, you would melt it along with your shea butter and oils at the beginning. Just keep in mind that products with beeswax won’t whip up quite as fluffy as those without, but they are excellent for heavy-duty moisturizing.
Common Mistakes to Avoid
Overheating the Oils
Why Temperature Matters
I mentioned earlier that shea butter can get grainy. This happens when the fatty acids cool at different rates. Overheating the butter exacerbates this issue. Keeping the temperature low and slow during the melting phase is the best way to ensure a smooth final product.
If your shea butter does get grainy, it is not ruined, but the texture will be a bit exfoliating rather than smooth. It melts once it touches your skin, but it looks less pretty in the jar. Keeping an eye on your heat source prevents this annoyance.
How to Fix Burnt Oil
If you accidentally burn your oils, unfortunately, you have to start over. Burnt oil smells terrible and isn’t good for your skin. This is why I advise against using a microwave to melt your ingredients. It creates hot spots that can scorch the delicate butters.
Always stick to the double boiler method. It takes a few minutes longer, but it guarantees that your ingredients stay safe. Cooking is about love and patience, and making skincare follows the same rules.
Getting Water in the Mix
The Risk of Mold
Water is the enemy of DIY body butter. Since this recipe does not contain preservatives, any water introduced to the mix creates a breeding ground for bacteria and mold. You must ensure your bowls, utensils, and jars are completely bone dry before you start.
Even a drop of water from the double boiler splashing into your oil can spoil the batch. I always wipe down my bowl after taking it off the heat just to be safe. Keeping water out ensures your body butter stays fresh for months.
Keeping Tools Dry
When washing your tools before starting, dry them thoroughly with a clean towel. I often let them air dry for a bit just to be sure. If you plan to use this body butter in the shower, do not dig in with wet hands.
Use a scoop or a spoon to get the product out if your hands are wet. This small habit extends the shelf life of your homemade goodies significantly. Treating your DIY products with care means you get to enjoy them for much longer.
Conclusion
Making your own whipped body butter is such a satisfying way to take care of yourself. It allows you to slow down and create something that is truly good for your body. I hope this guide helps you feel confident enough to try it out. Once you feel that fluffy texture on your skin, I promise you won’t want to go back to store-bought lotions.
Feel free to experiment with different oils and scents until you find your perfect combination. It is a fun creative outlet that results in a practical, everyday luxury. Happy creating, and enjoy your soft, glowing skin!