This project is courtesy of Jeffrey Court, FrogTape, Elkay, Liberty Hardware, and Lamps Plus. As always, all thoughts and opinions are my own.
Two steps forward, three steps back. Isn’t that how every project seems? This past week has been a roller coaster when it comes to this renovation. We haven’t had any major issues, but enough to keep me up at night thinking about how it’s all going to get done.
I’ve had so much fun documenting this whole Renovation Challenge hosted by Jeffrey Court with video, and this has been a very busy week, so without stalling any longer, here’s this weeks video diary.
In case you didn’t watch the video, let me give you the quick version here.
We finished stripping cabinets, primed everything (except the cabinet doors), decided to tear down a huge chunk of our ceiling, I painted for 10 hours in one day, we still aren’t done painting, our electrician friend saved the lighting day, and my father in law worked some magic to get sheetrock back up so our ceiling should be all back together within the next few days.
Now, here’s the full rundown of the past week and all the progress we’ve made in case you want all the nitty-gritty details. I know I LOVE reading about how other people make over a space.
The Good
First off, it was a wonderful mail week. Every day we’d get piles of packages and it was better than Christmas—even though I did buy most of them myself!
One of those packages was these gorgeous mini pendant lights that will go above our island from Lamps Plus. They were less than $50 a piece and really great quality! I can’t wait to get them installed.

At the end of last week we spent every evening stripping (no, not that kind!), sanding, and scraping away the old stain for hours.
We had a raging good Friday night in our house scraping stain until after midnight. We know how bad the condition of our cabinets were in and we really wanted to get them cleaned up really well so that our newly painted cabinets will last years to come, so all the scraping is worth it in the long run.
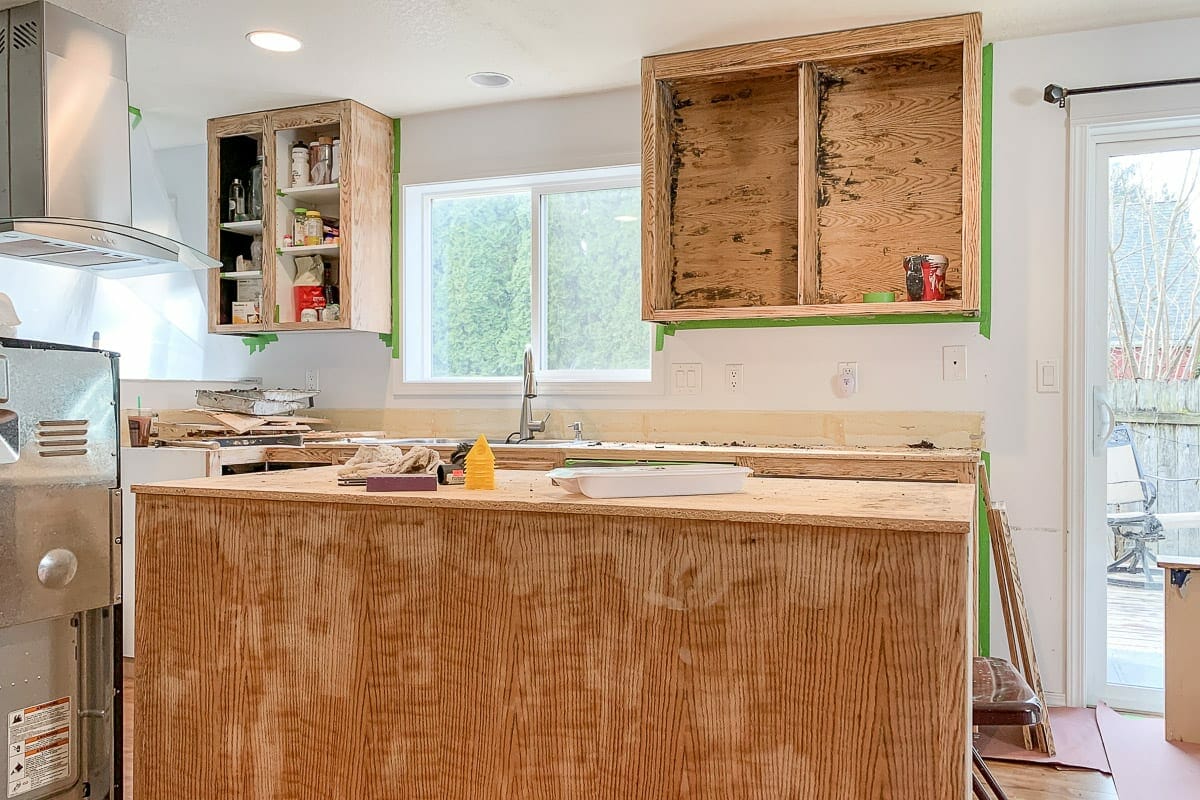
In the photo below, you can see the different variations of stain. We had to sand all of the high spots down, especially where there are different layers of stain due to the Citristrip pulling off multiple layers depending on how thick we applied it and how long it stayed on.
Saturday, my mom graciously took our kiddos for the morning so we pounded through getting primer on everything while the kids were out of the house and Justin pulled up all the particle board that was attached to the base cabinets with huge staples.

I will mention that we tried using the deglosser that came in the Rustoleum Cabinet Transformation Kit we’re using, however, we realized that it wasn’t relevant for our project since we already stripped all the polyshades off. In some areas of the cabinets, there was bare oak so we needed to prime anyways so we skipped the deglosser step.
The Bad
Ok, maybe that’s a little dramatic…but we ran into a few snags this weekend. We were rolling right along when our neighbor stopped by to take a look at our lighting situation. He’s a commercial electrician and we had asked if he could help us out.
Well, he pointed out that if we wanted the new pendant lights perfectly placed above the island then we should rip down the large chunk of the ceiling to give us access to all the beams. We also have a bad patch job from years earlier when our tub above the kitchen had a leak that we didn’t know about. Our ceiling texture is really difficult to replicate and he suggested a friend he knows who could texture if we decide to pull it all down.
Less than an hour later this went down.

When we’re on a roll, we don’t mess around. Justin called up his dad and they ripped down an 8’ by 6’ section so that we would be ready as soon as our electrician friend would have time to come rough in the wire for the new lights for us.

Sunday I got up early and started painting away. Ten hours, one very swollen finger that still has a hard time bending, and a whole audiobook listened to later, everything had two coats of bond coat.
The pure white bond coat shows everything on those smoother drawer faces so after letting it dry overnight I took a 220 grit sanding block to everything to smooth down the high spots.
Monday our neighbor came back, wired in two new lights for the island pendants, moved one can light to above the dishwasher, and then rewired the light switches. Everything went down without a hitch so that was awesome and we’re almost back on track!
Maggie loved standing on her little toy chest watching over the half wall since we wouldn’t let her hang out in the kitchen while they were working.

On the docket this week we plan to finish mudding and hopefully having the guy come to texture. I also need to do one more layer of bond coat and then the protective top coat. Once that is all dry, we will install the counters, put in the gorgeous new sink, and then we get to move onto the really exciting part…TILING!
I’ve always wanted to tile, but have never had the need to do it. I took a class from Jeffrey Court at a conference last summer and they made it seem so easy. I can’t wait to get my hands dirty and start putting all the pieces together on this kitchen.
 I’ve got a handful of other smaller projects I’m hoping to work on this week, so be sure to follow along on Instagram @acraftedpassion to see what things I tackle.
Here’s the official updated project list…
PROJECT LIST
• Clear out kitchen
• Remove counters
• Remove bar counter
• Remove molding
• Strip all cabinets
• Sand cabinets
• Fill cabinet knob holes
• Clean cabinets
• Paint cabinets (half done!)
• Rip down ceiling
• Rough in new lights
• Paint & install molding
• Install cabinet hardware
• Install countertops
• Install sink
• Install faucet
• Seal butcher block
• Build & install half wall cap
• Paint wall cap
• Refinish table
• Install tile
• Grout tile
• Make custom drawer organizer
• Wire and install island lights
• Install new flush mount
Thanks again to all our incredible sponsors who are making this renovation possible!
Jeffrey Court | FrogTape | Elkay | Lamps Plus | Liberty Hardware