Make some easy geometric art to hang in your modern home. It’s so simple and can be finished in under an hour and looks great!
If you’ve been following along with the Naptime Craft Time series, you know I’m all about simple, budget-friendly decor. This one is no exception. Coming in at under $10 and 15 minutes of work, this geometric art looks great and is a definite winner!
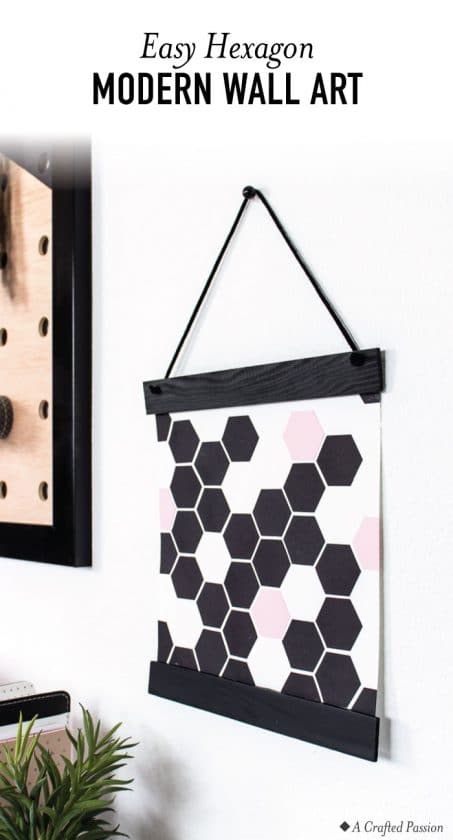
I put it up next to my giant pegboard above my desk and it brings just a little bit of color to the otherwise neutral space.
Let me show you how to make your own!
*This post contains some affiliate links for your convenience (which means if you make a purchase after clicking a link I may earn a small commission, but it won’t cost you a penny more)! Click here to read my full disclosure policy.
Craft Time: 15 minutes
Waiting Time: 1 hour
Skill Level: Easy
Cost: ~$10
Materials to make your geometric art:
- 2 – wood paint sticks
- Sandpaper
- Drill
- White, black, and pink cardstock
- 1.5″ hexagon punch
- Glue stick
- Scissors
- Matte black spray paint
- Leather lace

1. Cut Paint Sticks
Start by cutting your paint sticks down to size. If you’re using 8.5×11 art, you’ll want to cut your paint stick to 9″ so you have a 1/4″ overhang on either side of your art.
2. Drill Wood
Take one of your paint sticks and make a mark on both sides at 1″ from the short edge and 1/4″ from the top. This is where you’ll want to drill a hole. Make sure your hole is large enough to just fit the leather lace.
3. Sand Wood
Sand your paint stick down to take off any markings that might be on the stick and smooth it all out.
4. Paint Wood
Now, it’s time to give it a few coats of matte black spray paint. Be sure to give it at least 15 minutes between each coat to dry.

5. Cut Hexagons
While you’re waiting for the paint to dry, take your hexagon paper punch and punch out your black and pink cardstock. I used 28 black and 4 pink hexagons.
6. Design
Now, starting from one edge, place your black hexagons on the white cardstock to fill the paper leaving a small gap between them.
Then remove about 1/3 randomly.
And then replace a few black hexagons with pink ones.

This is the best way I found to get it looking purposefully random. Be sure to run some off the edge of the page because you can cut them down later.
7. Glue Hexagons
Glue it all down using your gluestick and you’re pretty much done!

8. Cut Edges
If you have some hanging off the edge, just grab some scissors and cut them flush with the cardstock underneath.
9. Attach “Frame”
All you need to do now is attach your art to your stick “frame” and hang it up.
Just add a few dots of gorilla glue to the top and bottom of your art and attach the edge of your dry painted paint sticks to the art. Make sure that the paper doesn’t cover the holes you drilled previously to thread the leather lace through.
Once the glue is dry, thread your leather lace into the holes and tie a thick knot to hold it all in place.

I love how simple this art is and looks great! I mean it’s literally just cardstock I had sitting on my shelf and paint sticks left over from a project. All I had to get was the hexagon punch. That’s a winning project in my book!
This is day 6 in the 28 Days of Naptime Craft Time series. Catch up on all the projects you may have missed here.
