Fun fact….I worked full-time as a front desk clerk at a Marriot hotel my senior year of high school. What that also meant is I needed pretty hands. Maybe it was just our hotel, but we all insisted on having nice nails since guests were always looking at our hands as we gave the keys and maps and bills. Rather than paying a fortune like other ladies did though, I figured out how to do nails myself. Until I had babies, I pretty much always had pretty fingernails. My favorite way was water marbling with nail polish. They looked complicated, but were actually really easy!
As I thought of some different ways to decorate Easter eggs I realized I could use that same concept to decorate Easter eggs with nail polish. Check it out to see how to make your own! The possibilities and color combos are endless!

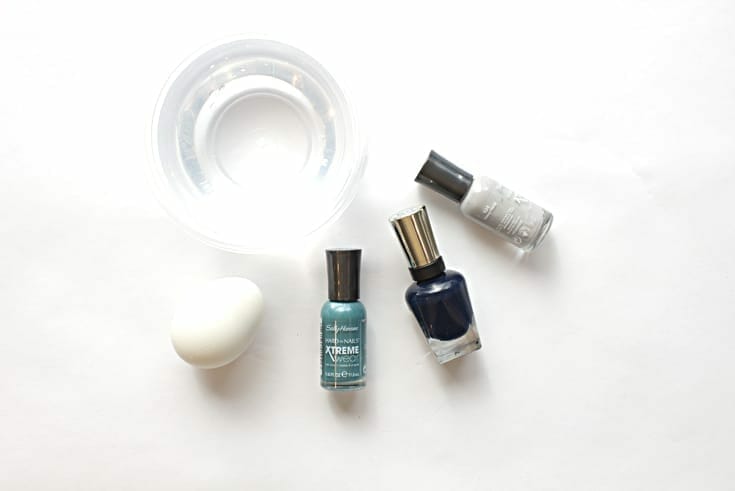
What you need to decorate Easter eggs with Nail Polish:
- Container
- Water
- Nail polish
- Stirrer or toothpick
- Glove
1 | Water
First, take your container and fill it with enough water so the egg can be fully submerged. Don’t have the container be too large or else you’ll end up wasting quite a bit of nail polish.
2 | Add Nail Polish
Now, take your nail polish and pour color on to the top of the water, alternating colors. Don’t let it come out too fast or else it will sink to the bottom and not spread on the top of the water like it should. I used blue, teal, and gray nail polish I just grabbed from the Dollar Tree.
Tip: It’s better to pour out of the bottle rather than let it drip from the nail polish applicator because it can take too long and you need to move rather quickly so the polish doesn’t dry too much.
When the nail polish spreads, if it doesn’t go all the way to the edge, gently touch it with a toothpick or stirrer to drag it to the edge of the container so it covers all the water surface.

3 | Design
Alternate pouring colors until you have a good mix and then drag your wooden stirrer or toothpick through the polish creating a design.

4 | Dip
With a gloved hand, take your egg and quickly dip it into the nail polish pushing down to the bottom of the container. Twist the egg to get the nail polish off the edges. If it doesn’t pull away, just use a toothpick to pull the polish away from the egg and container on the water surface.

5 | Remove
Quickly remove the egg from the water and set upright to dry.

These marbled Easter eggs are gorgeous and I had so much fun playing around with different designs. These would also look cute if you dip dyed the egg before dipping it in the polish. This took me back to my high school days of water marbling and makes me wish for the days when this busy momma has time to paint nails again.

So, what do you think? Ready to decorate some Easter eggs with nail polish? If you do it, tag me @acraftedpassion so I can ooh and aah over your Easter eggs!
Looking for more ways to decorate Easter eggs? Check out 5 more ways here!

One thought on “How to Decorate Easter Eggs with Nail Polish”
Comments are closed.