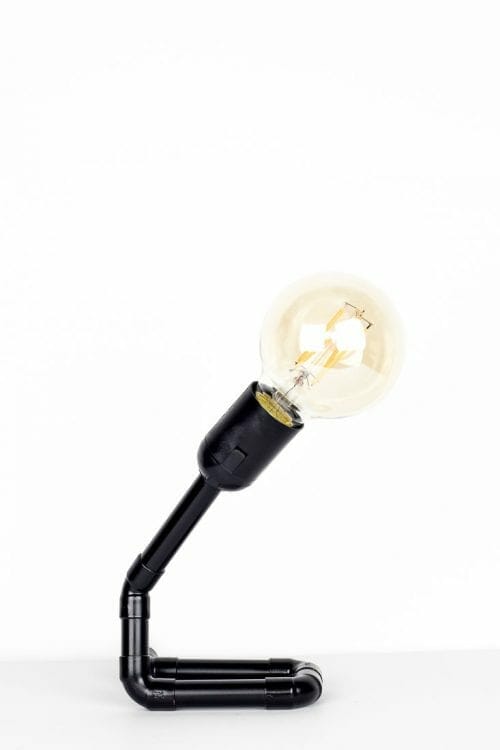
If you didn’t know it yet, I kinda have a thing for copper pipe. I feel like a kid cutting pipe and piecing them together to actually form something.
This simple pipe desk light is one of my favorite projects I’ve made and I realized I never shared it on here since it was included in my book.
By the way, if you haven’t grabbed your copy of Creative Momma, you can get it on Amazon here!

SUPPLIES NEEDED TO MAKE A DIY EDISON DESK LAMP:
- 1/2” copper pipe
- Pipe cutter
- 4 – 1/2” copper pipe elbows
- 1 – 1/2” copper pipe 45 degree elbow
- JB ClearWeld quick-set epoxy syringe ٚ
- Disposable container
- Spray paint

INSTRUCTIONS
1. Cut
Cut all straight pipe lengths.
You need:
- 1 – 1”
- 1 – 2”
- 2 – 3”
- 1 – 4”
2. Connect
Feed light cord through pipe starting with the piece closest to the bulb socket.
3. Test
Dry fit it all together feeding the cord through as you go.
4. Glue
Mix the 2-part quick-set epoxy in a disposable container. Quickly secure all pipe together to create the lamp with the cord fed through the pipes
5. Dry
Let sit overnight to set.
6. Paint
Spray paint a few light coats once the glue is all dry and then you’re good to go!
That’s it! I love how my Edison desk lamp using copper pipes turned out. It can be placed on your office desk or even your bedroom side table.

Are you excited to make your own this Edison lamp? I would love to see your finished product!
