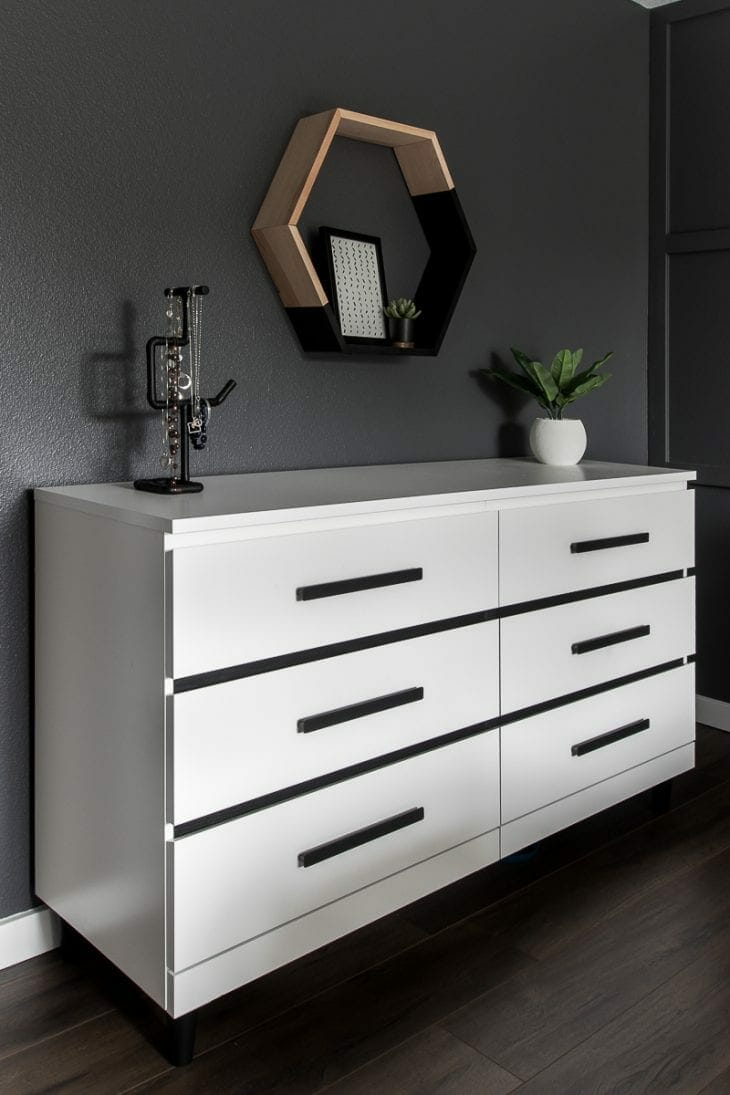
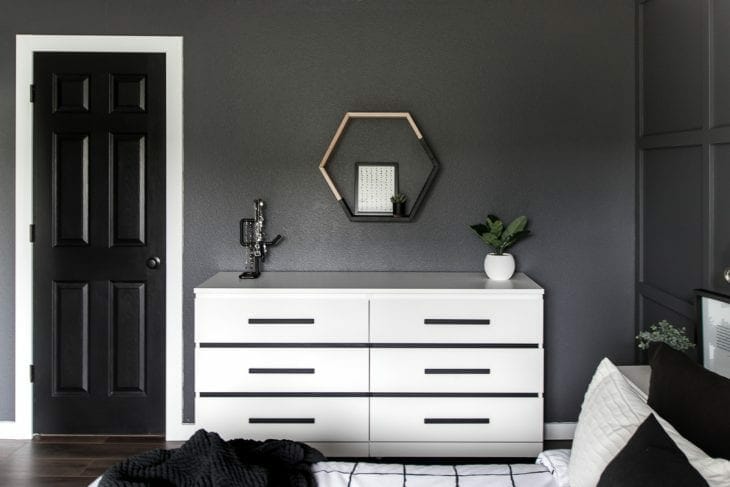
Makeover a simple IKEA Malm dresser into a modern dresser perfect for your bedroom.
Watch this DIY Step-by-Step
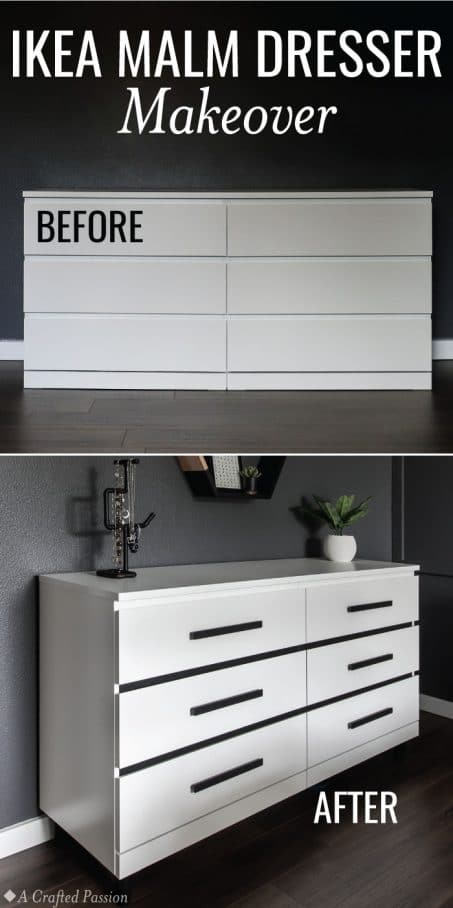
This before and after is incredible and so easy!
When we were planning out our modern master bedroom makeover, I knew I wanted to incorporate contrasting elements wherever possible and I also knew we definitely wanted a short and wide dresser compared to the tall one we had before.
I love the IKEA Malm dresser or this similar one from Amazon, but it was a little too simple for the look I was going for. No problem! I can fix that easy.
Let me show you how I transformed a simple IKEA Malm dresser into a sleek and modern black and white dresser.
*This post contains some affiliate links for your convenience (which means if you make a purchase after clicking a link I may earn a small commission, but it won’t cost you a penny more)! Click here to read my full disclosure policy.
What you need to makeover your IKEA Malm dresser:
- Assembled Malm dresser
- 4 – 5″ dresser legs
- 2 wood blocks
- 1 – 5” tall wood support painted matte black
- 6 drawer pulls
- Black wood contact paper
Tools you’ll need:
- Measuring tape
- 8 – 3″ Torx screws
- 4 hex bolts
- Drill
- Drill Bits
- Impact Driver (this is better than just a screwdriver so that you get the extra torque to really secure the block of wood to the side of the dresser — just be sure you don’t go too far and screw through the other side!)
- X-acto knife
- Scissors
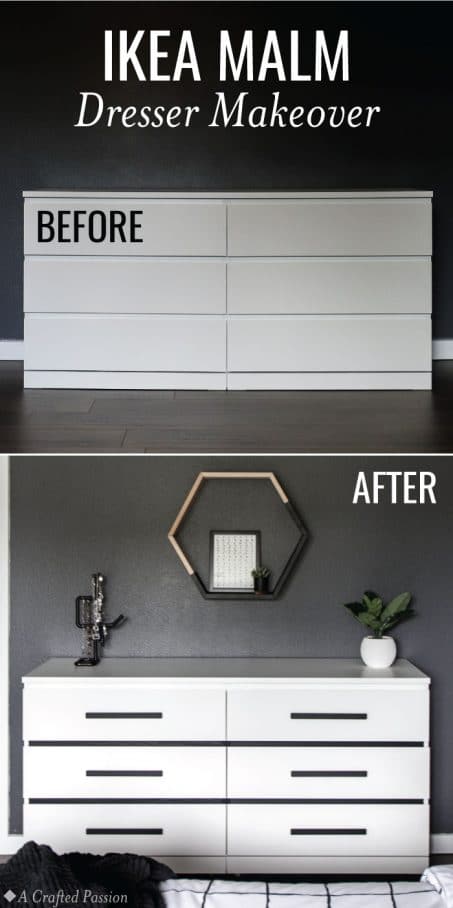
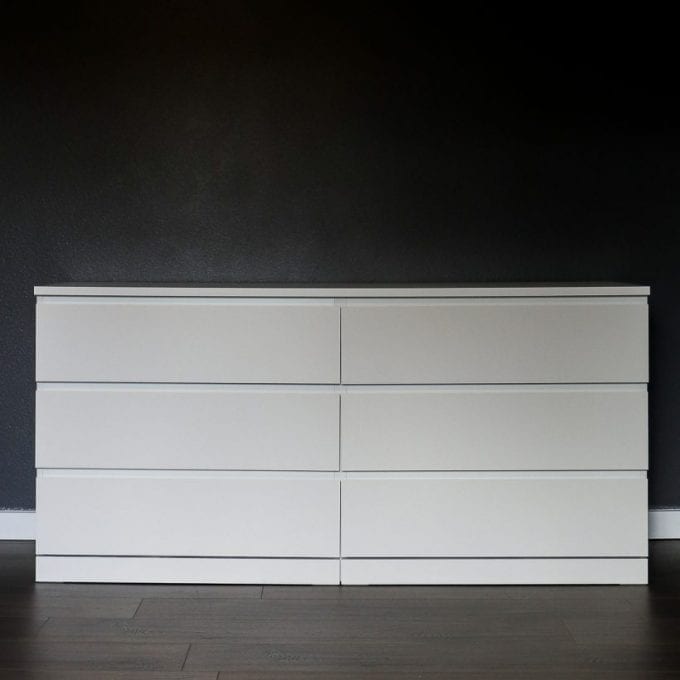
Just as a reminder, here’s what the dresser looked like assembled as-is.
Now, let’s get started!
Instructions for Adding Legs

Since the bottom of the IKEA Malm dresser is open, first we need to add support pieces to the underside of the dresser that the legs can attach to.
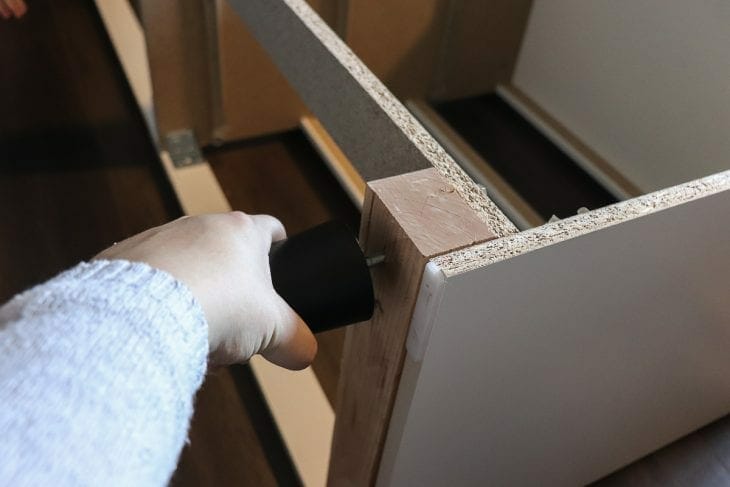
1. Prepare Wood Supports
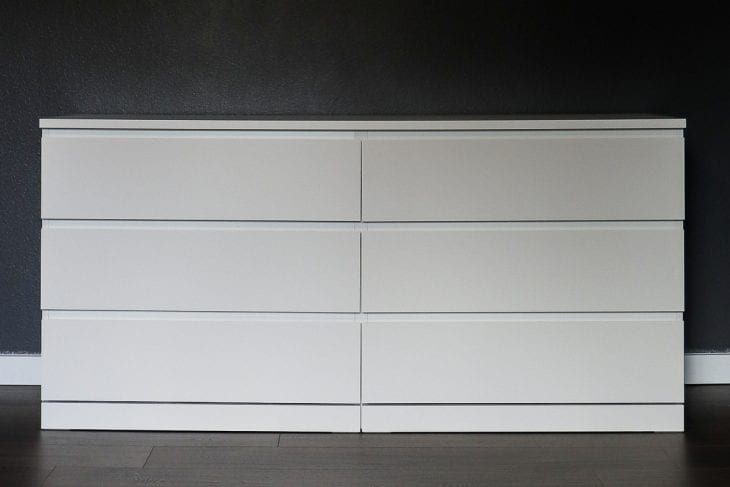
Start by cutting your wood blocks to size. They need to be able to fit under the back brace, tucked right up against the front corner, and be just wide enough that the screw will go into the side, but not out through the other side.
For extra support, cut out a little notch for the screws that are attached to the front board and sides of the dresser so the board can fit snug right against the front corner of the dresser once screwed in. I just used a drill bit that was larger than the screw head that is already on the dresser and drilled a little bit of the way in.
You don’t want to drill too far or else you risk jeopardizing the integrity of the wood block.
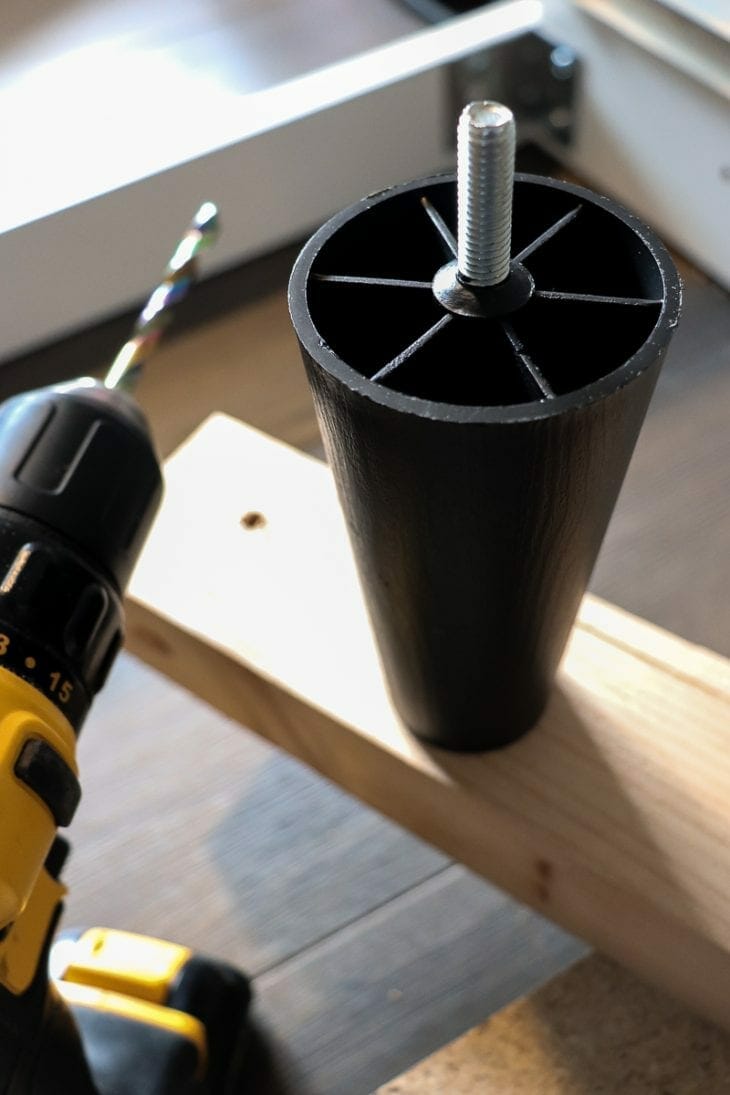
2. Drill Leg Hole
Measure an equal distance on the front and back of your support piece and drill a hole a bit smaller than the size of the leg screw.
3. Attach Side Supports
Now, it’s time to attach your support pieces.
I highly suggest using these Torx screws because these are super secure will be able to handle the weight of the dresser.

Pre-drill four holes on the side of the wood making sure they won’t overlap with the leg bolts. You don’t need to drill all the way through the wood, just enough so your screw will be on the straight and narrow path and won’t split the wood.

I found it easiest to drill the screws in most of the way through and then you just have to finish it off while attaching it to the side of the dresser.

Screw those suckers in and make sure that you stop before they poke through the other side. If you are using an impact driver — which I highly suggest you do — they will just keep on going once you hit the edge so you just need to be really careful you’re paying attention.
I also added a few hex bolts to the back support brace that is apart of the dresser just for a little extra piece of mind. Again, just be sure they don’t overlap with the holes you’ve already drilled where your legs will screw in to.

Repeat these steps on the other side of the dresser.
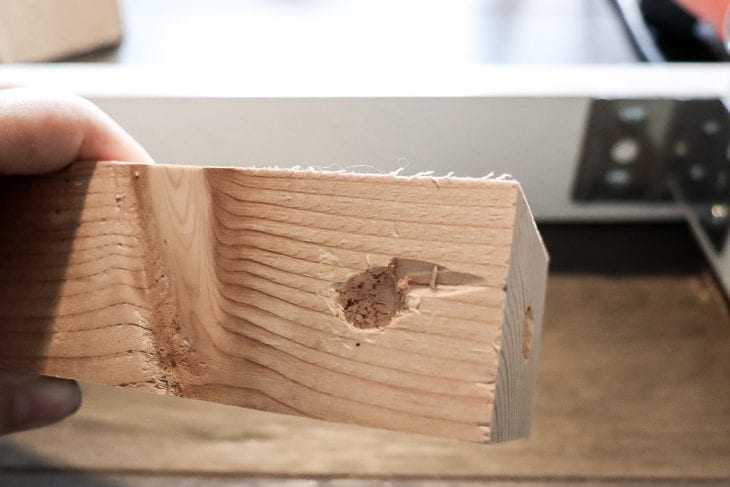
4. Attach Legs
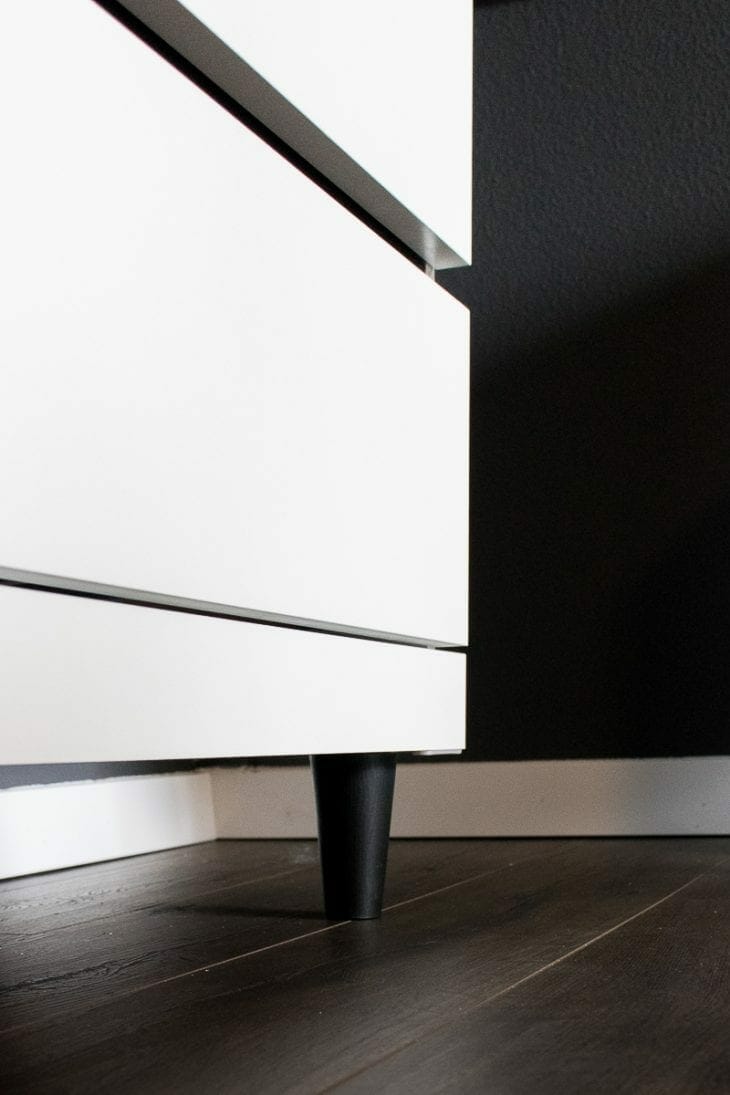
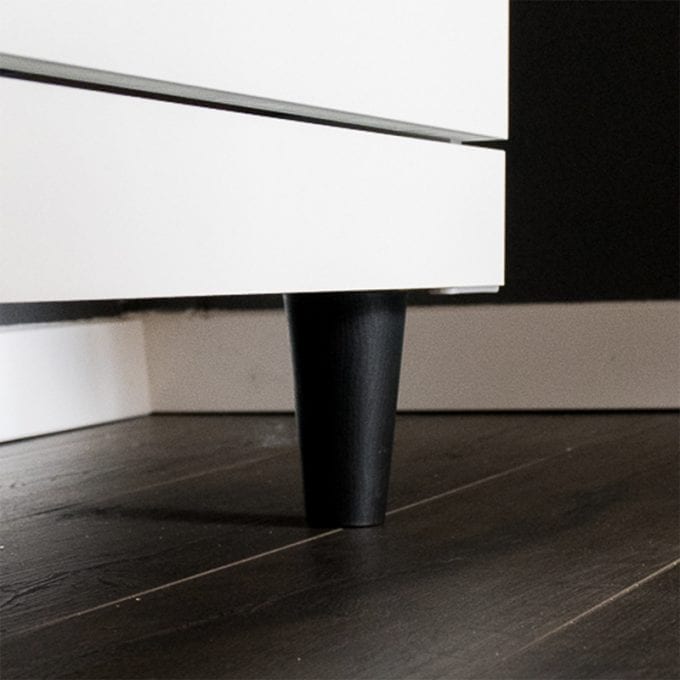
Once both support pieces are attached, lay your dresser on its side and twist your dresser legs into the holes you’ve already made.
I love that these legs have a subtle angle to them and wood texture. It ties in well with the rest of our room!
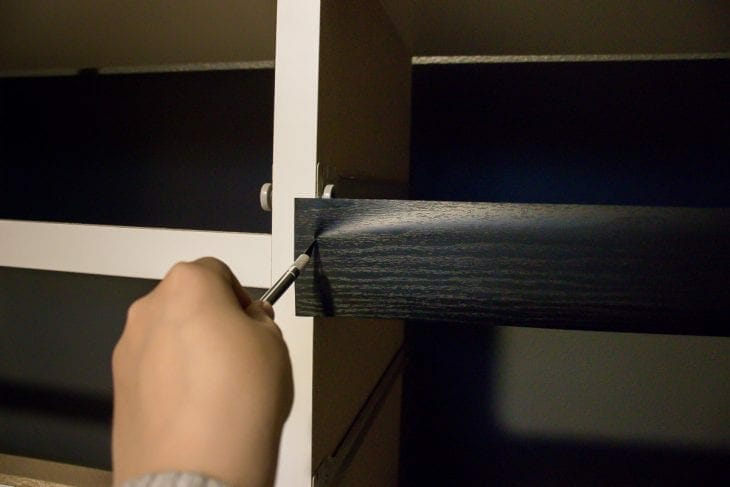
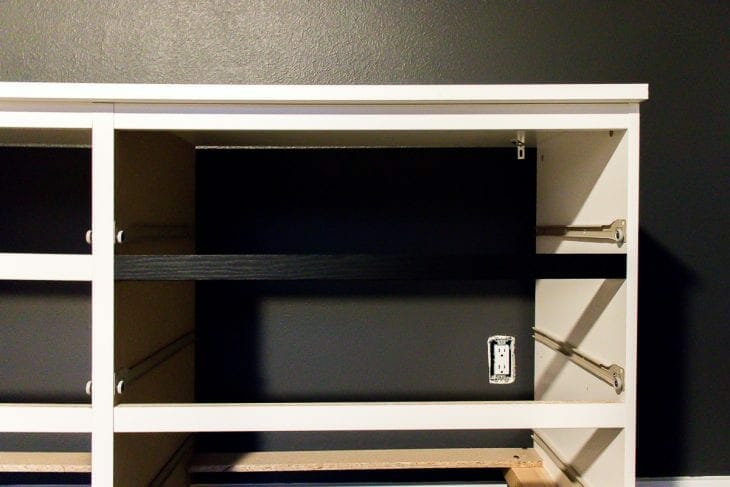
5. Add Mid-Base Support
Once the legs are secure, flip your dresser right side up and you might notice that the middle sags a bit. (It might not be too noticeable until you add the drawers and the middle shadow is wider at the bottom than the top.)
You can either buy another set of the dresser legs to add to the center of the dresser, or you can do what I did, and just add a wood block painted black to sit under the middle dresser support.
Honestly, no one will ever notice the block unless you tell them or someone is on the ground pulling something out from under the dresser.
The 5″ block did wonders for making the dresser more sturdy and took away any sagging.
This picture below is when I was testing placement of the blocks. I found it was best when the support was placed about 1/4 of the way back from the front right in the middle.

These legs really add a little more personality and make the dresser look a lot more expensive. I also love that it gives it more height. Before, the dresser was just above 8″ taller than the nightstand and looked a little funny next to each other.
I could have left the legs as the only thing I did and it would have been a huge improvement, but I thought it needed a little more contrast.
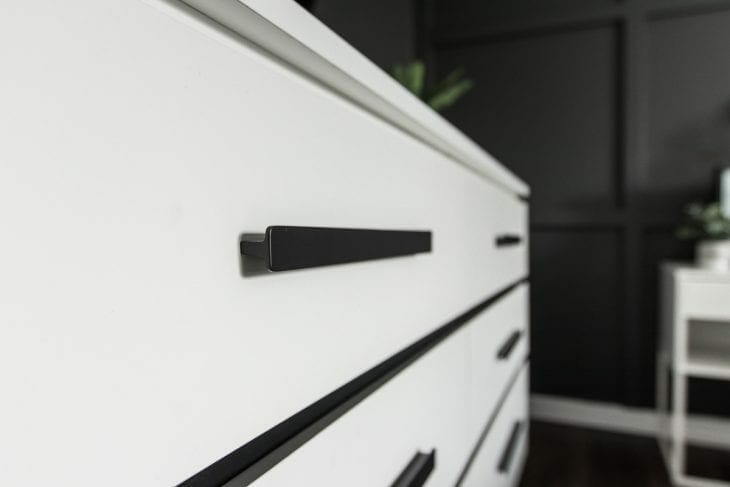
Instructions for Adding Vinyl
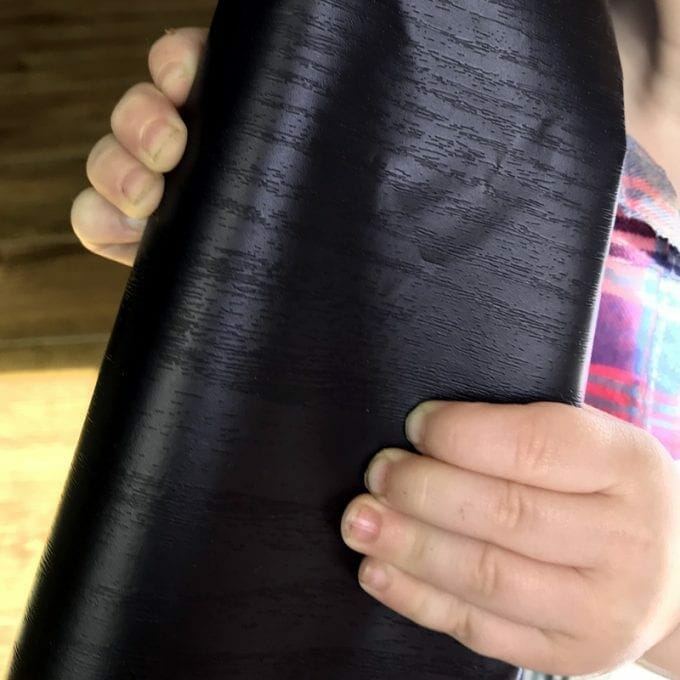
Next, I added some black wood contact paper to the middle supports on the front face of the dresser. I cut some strips of contact paper that were about 4″ wide and covered the length of each support piece for the drawers.
I used an x-acto knife to trim the edges to match perfectly and then I folded the top and bottom to wrap around the full piece of wood.
I did each middle piece first and then I did a long strip to cover the center strip of wood.
When you look up close you can see the subtle wood texture and I love how it looks! It’s those little things that make a DIY room makeover special.

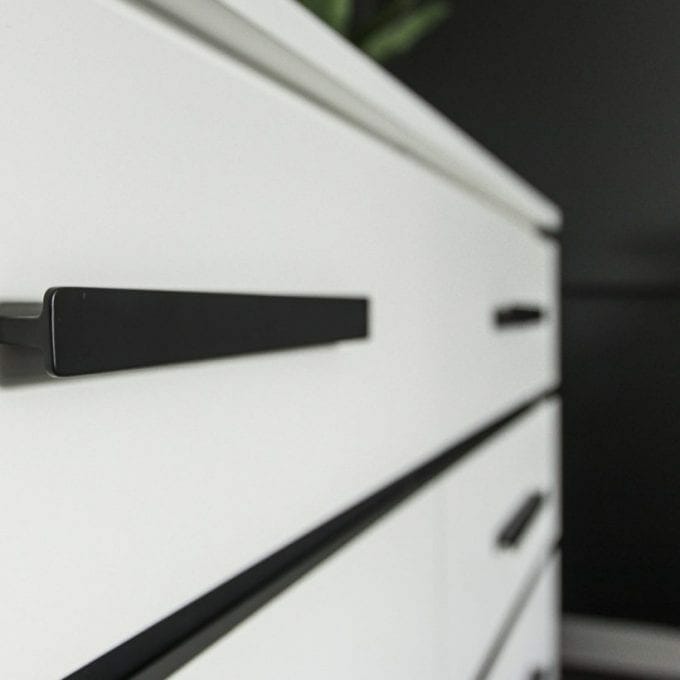
Tips for Adding Drawer Pulls
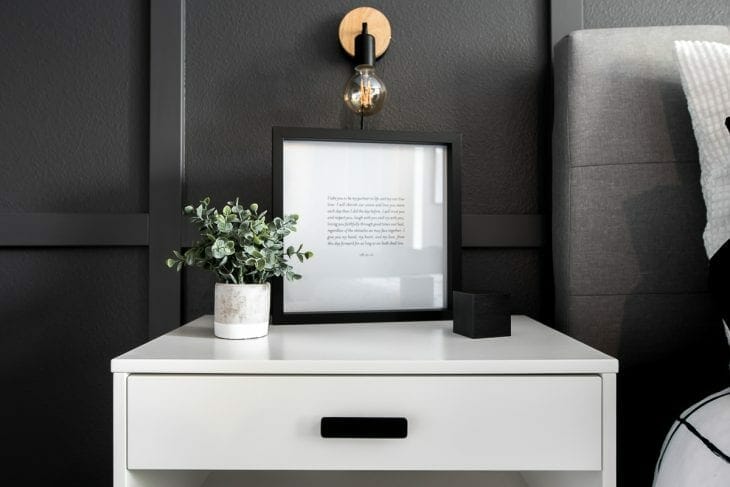
Lastly, I added black drawer handles to each drawer. I found these 12ish” drawer handles at IKEA and matching 4″ ones at IKEA to go on the nightstands.
I asked Justin to take pictures as I attached the handles to the nightstands, so that’s what the pictures are from, but you’ll get the general idea with the dresser.
The goal is to measure center multiple times from each edge and then measure out to where your screw holes are.
The dresser handle has screws 10″ apart which makes measuring easy.


Once you have center marked, take your level with the drawer in the dresser (or nightstand) and draw a line. This will make sure that the handles will appear level once it’s all done if the drawer slides aren’t attached perfectly level.

Once you are confident your marks are in the correct spot and an equal distance apart, time to drill. Remember…measure twice (or five times in my case), because you can only drill once.

Attach the handles and voila!
…Beautiful matte black drawer handles that help transform your IKEA Malm dresser!

I love how this dresser turned out, but I might be a little bias, so let me know what you think in the comments!
Here’s how the nightstand turned out in case you were curious. If you love these nightstands as much as I do, they are the Vikhammer nightstand from IKEA, pretty reasonably priced, and have soft close!

What do you think of this IKEA hack?
If you missed the whole room transformation, check out how we transformed our boring, beige bedroom into this monochrome modern master bedroom.
Click the image below to see the source. Some affiliate links may be included.
Really love it, anxious to do it!
Tankx XO
Oh I love this. Often furniture makeovers are cute and quirky (which I also love) but this one has created a proper sophisticated modern piece which looks so expensive. Pinning.
What a difference it makes to lift it off the floor. Makes me wonder what other furniture we can put legs on and sweep or vacuum under. Thanks for sharing your makeover. The room looks great!
mybrightideasblog.com
That turned out great! Thanks for sharing this with us at the Homestead Blog Hop, please come back to see us again soon!
Why not just screw the supports into the sides? The dresser rests entirely on them anyway – the front piece is just to make the dresser look a little more finished.
hi there! love this. i want to do something similar to the vikhammer nightstands i just ordered with drawer pulls from CB2. My only question is, is there an easy way to do attach them without drilling? Do you think command strips will work well? Any other suggestions?
Beautiful piece. Nice work! QQ. it looks as though the bottom piece of wood, where the legs are nailed in, are flush with the rest of the dresser. With the Malm the bottom piece is set back. Is that just a lack of depth with the camera angle? Looks like another piece of wood was added. Planning to add legs as well, so was just curious. Thanks!
I really like what you did with this plain dresser ! And your bedroom is absolutely gorgeous !!