Create a simple clothespin memo board to keep important notes or display your favorite pictures with this easy DIY idea.
On my old cork board above my desk I kept some of my favorite photos of my kiddos, an old photo of my husband and I when we were 3, and little reminders to myself. Now that I ditched that cork board for a pegboard I wanted to figure out a spot to keep some of those little things.
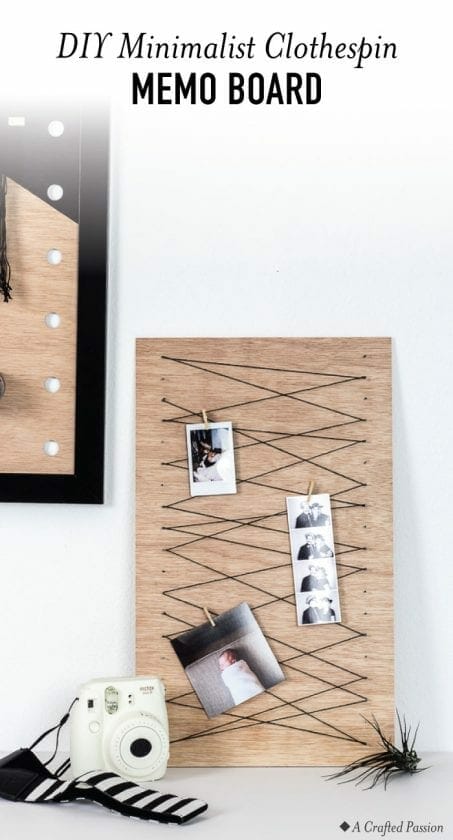
I came up with this clothespin memo board using nails and embroidery floss and I LOVE how it turned out.
*This post contains some affiliate links for your convenience (which means if you make a purchase after clicking a link I may earn a small commission, but it won’t cost you a penny more)! Click here to read my full disclosure policy.
Craft Time: 15 minutes
Skill Level: Easy
Cost: $10

Materials to make your clothespin memo board:
- Board
- Sandpaper
- Ruler
- Thumbtack
- Nails
- Black paint optional
- Hammer
- Embroidery floss
- Mini clothespins
1. Cut Board
First, you need to cut your board down to size. Mine is 12″x20″. This is just a piece of the 1/4″ birch plywood leftover from the DIY giant pegboard.

2. Nails
Take a thumbtack and ruler and mark where each nail goes. I found this is much easier and precise than trying to hammer in those teeney tiny nails. Just push the thumbtack in about halfway down. I put my nails starting at every inch.
I chose to paint my nails black to match the raw wood and matte black theme I’m going for in my office, but you can totally leave them plain if you want. If you to want to paint them, throw a handful in an old Amazon box we all have laying around in our garage and spray paint them while lightly shaking the box. I’ve found that’s the best way to evenly coat small objects.

Once you have all your nail spots marked, hammer in your nails so there is about a 1/2 inch sticking out from the board.

3. String
Now, tie one end of your embroidery floss onto a nail and start stringing your thread between nails in whatever pattern you like. Once you’re done, just tie it off, cut off the extras on each end, and you’re done!


Attach notes or your favorite pictures with mini clothespins and set on your desk. You could add a command strip or sawtooth hanger to the back if you want to attach it to your wall. Personally, I’d suggest a command strip just so you don’t risk your sawtooth hanger nails splitting the wood. (Learn from my experience.) :)

What will you put on your memo board?
I love how simple and practical this project is!!