Finding the perfect dresser can be so tough. Add on top of it a serious timeline we had to stick to and that made the whole thought even more daunting.
As I started planning Clara’s toddler chic bedroom makeover mid-September for this season’s One Room Challenge, I dreamt of finding a dresser that would be the perfect size to tuck into the odd-shaped walls in our then guest room but also have enough character that it wouldn’t be lame. Here’s my dresser wishlist:
- Drawers that are easy to open and close for a toddler
- Had character, or at least potential to look classy
- No more than 20″ deep
- 70-75″ long
Well about once a day for a few weeks I would open Craigslist and see if the perfect dresser was waiting to be found for our room. As the days started ticking by I got more nervous and then one night I went on, and BAM. There it was in all it’s glory! I jumped on that sucker and claimed it before we even had a chance to drive to the lady’s house.
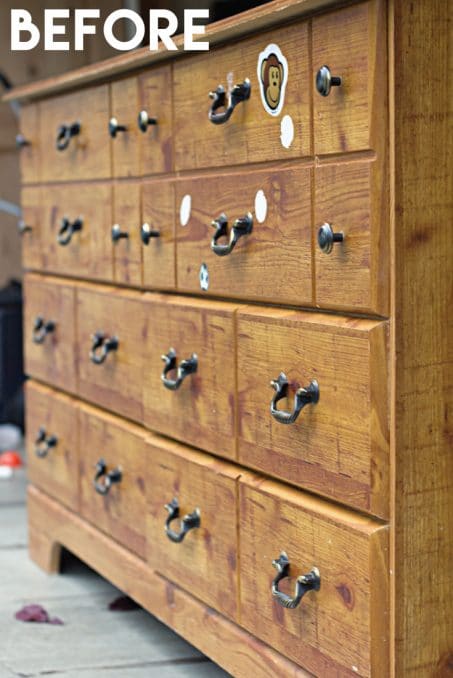
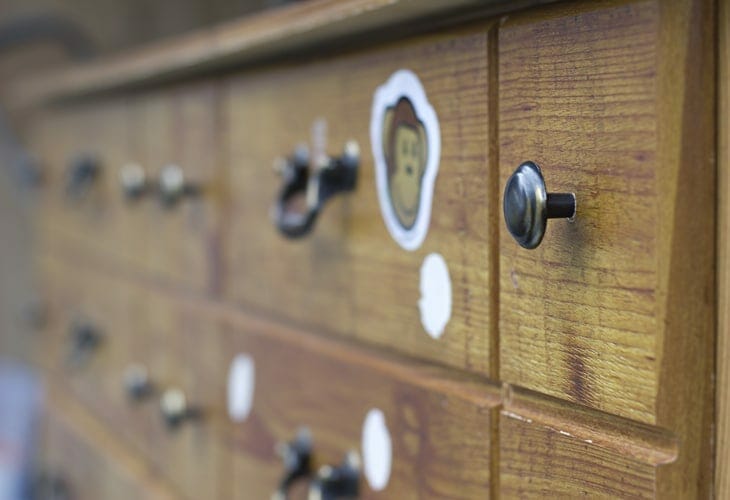
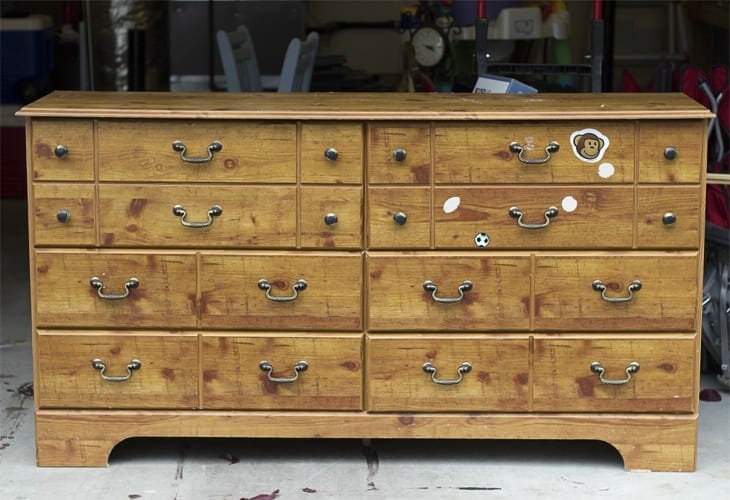
For $25 I had found a dresser that met all our criteria, plus had monkey stickers to show it was used and loved. I had big plans for it and once I got the dresser home it was time to get to work.
This dresser makeover was sponsored by Orchard Supply Hardware. This post contains some affiliate links for your convenience. All opinions are 100% mine. For more information, see my disclosure here.
Here’s how I transformed this dresser and how we overcame some of the obstacles.
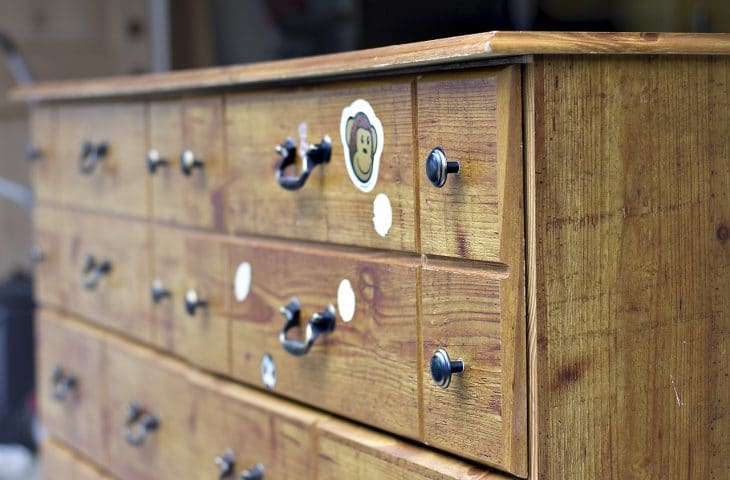
So, let’s begin with those stickers…
Who knows how many years they acted as decor but the stickers had eaten through the wood laminate so after some scraping and cleaning we were left with a nice dent. Nothing that a little sandpaper and paint couldn’t fix though!
Ok, on to paint.
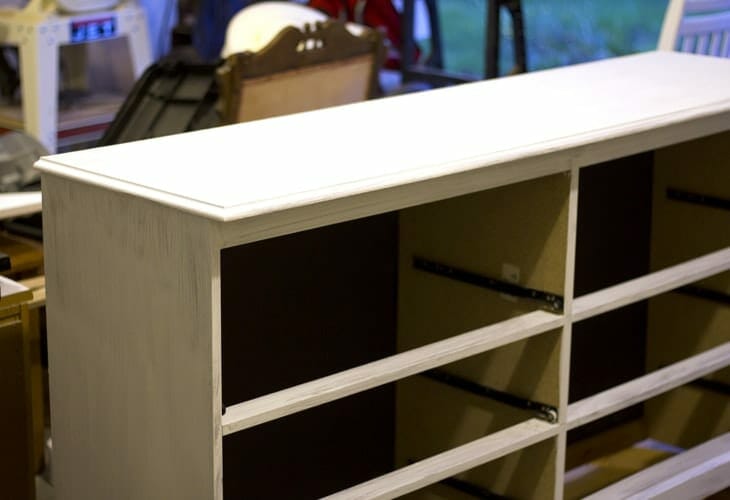
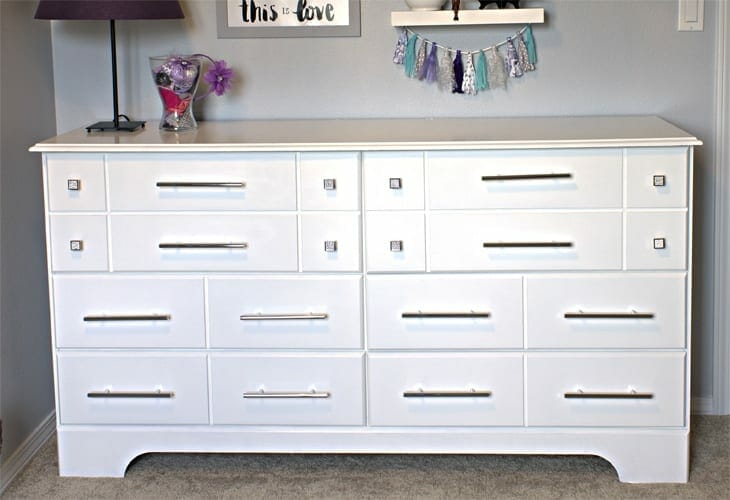
Y’all, I’ll try to keep it together but I’m seriously ready to paint ALL THE THINGS in this paint! This Benjamin Moore Advance Semi-Gloss paint is the perfect paint for painting a dresser, or any furniture for that matter, in a kids room. After one coat of Benjamin Moore Fresh Start Primer, I did two coats of the Advance paint in Benjamin Moore Simply White and when that stuff dries it’s like magic! Literally hard as plastic and will be so easy to clean.
It definitely was the perfect paint to use for Clara’s toddler bedroom, plus it matches the look of all the other white furniture perfectly.
Now onto the hardware.
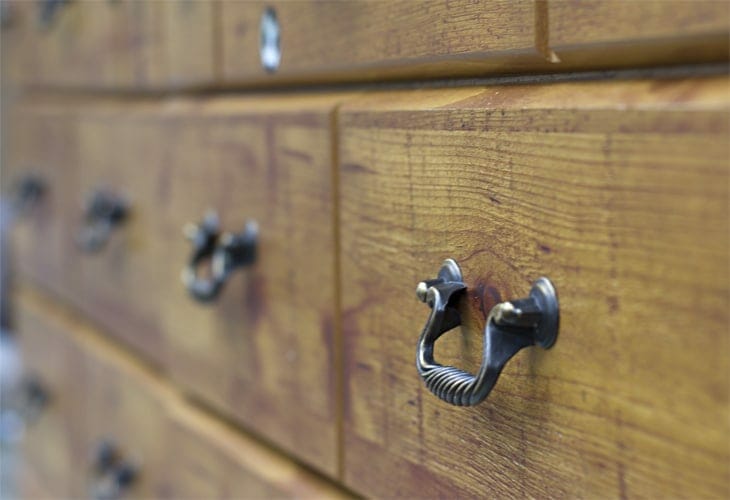
Here’s a reminder of where we started…
These knobs and drawer pulls needed a serious upgrade!! Definitely not a good fit for our toddler chic bedroom.
Now this was a little more of a battle than I originally thought it would be. Going along with the glam chic theme, I found the perfect hardware at Orchard Supply and happily took it home to install one evening. Well, it didn’t go as planned.
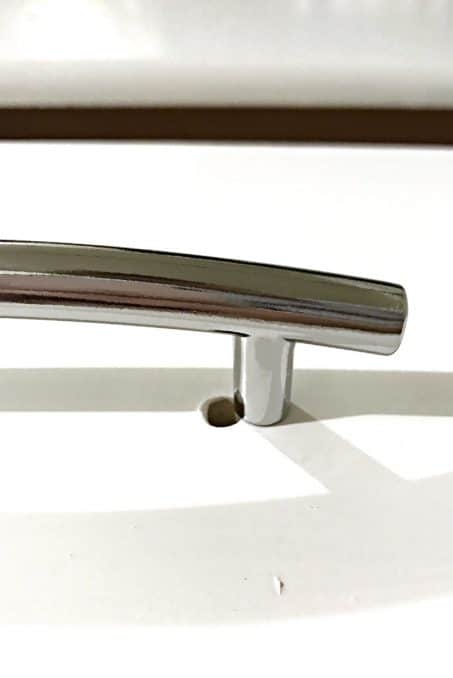
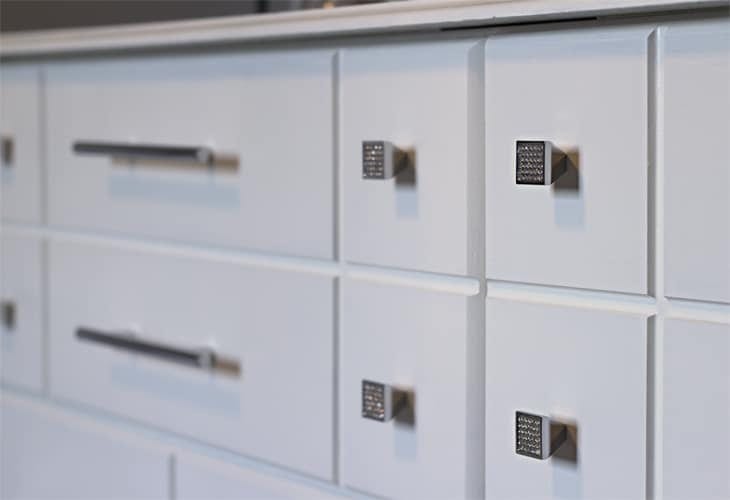
The crystal square chrome knobs (similar to these ones I found) were AMAZING! But the drawer pulls proved a little more difficult.
After installing one pull I realized my rough measuring was a little too rough and the pulls were about 1/4 inch too long. “No problem,” I thought, “I’ll just head back to the store to find some shiny chrome drawer pulls that do fit.”
Well, not so much. Apparently the dresser was older than I thought and the drawer pull size is not used much these days.
Ok, let’s go to plan C…
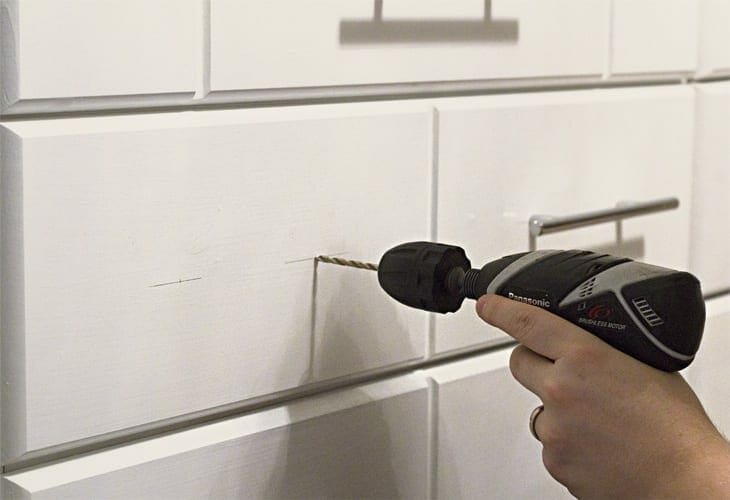
I knew I either needed to find pulls that were significantly shorter than the current holes or much longer so that the new holes wouldn’t overlap. I finally found these 128mm chrome drawer pulls that would be super easy for a toddler to loop her little hand through to open and close.
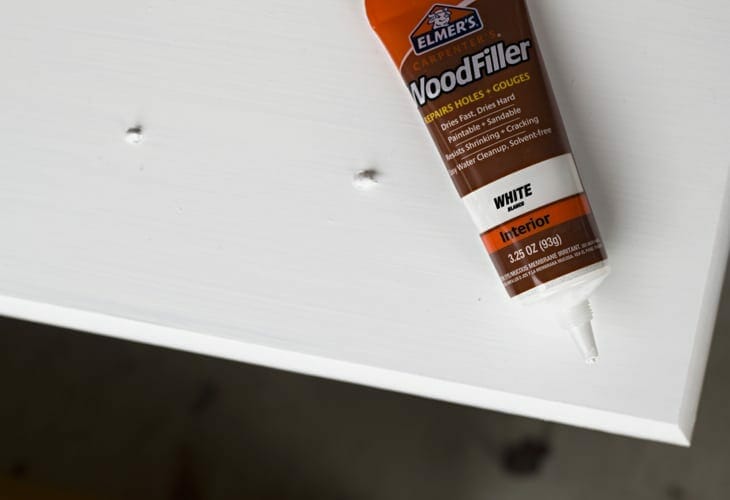
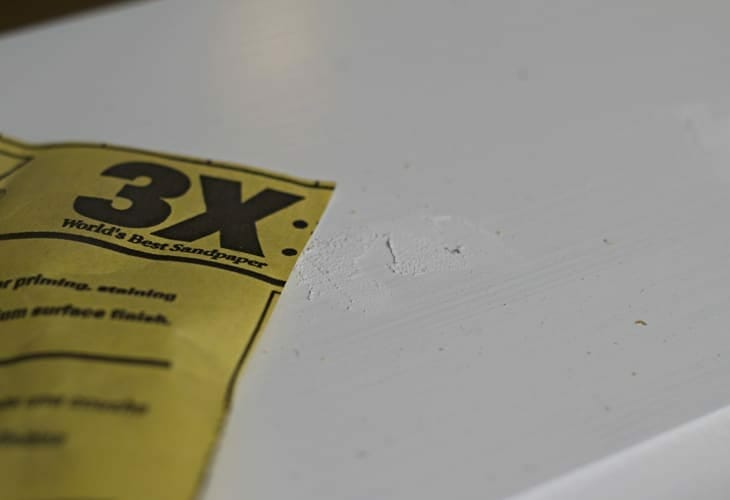
So a few fills with Elmer’s white wood filler, some fine sand paper to smooth things out once the wood filler dried, some new holes drilled, and a new coat of paint, and we had a winner!!
The not-so-secret secret…
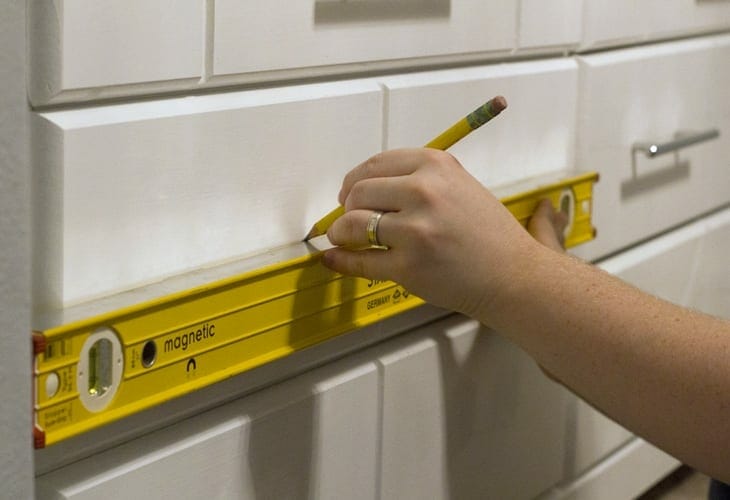
Okay, confession time. Installing new handles is not exactly easy. Did you know that even if you measure things perfectly that the pulls can still come out looking crooked once their set in the dresser?
No worries though, after having trouble with the first pull, we switched things up and worked out a system that looks perfect. First, we put all the drawers in the dresser and held a level up so that it split the holes for crystal knobs while still being level. After that, we marked the hole positions with a pencil so that the pulls were centered and drilled the holes. On the drawers without knobs, we measured to the vertical center of the drawer and aligned the level to that mark and followed the same process for drilling the holes.
This way they all visually appear straight even if the drawers sit a little off in their tracks.
This dresser proved a little more difficult than planned with the drawer pull debacle but I seriously couldn’t be more happy with how it all turned out!
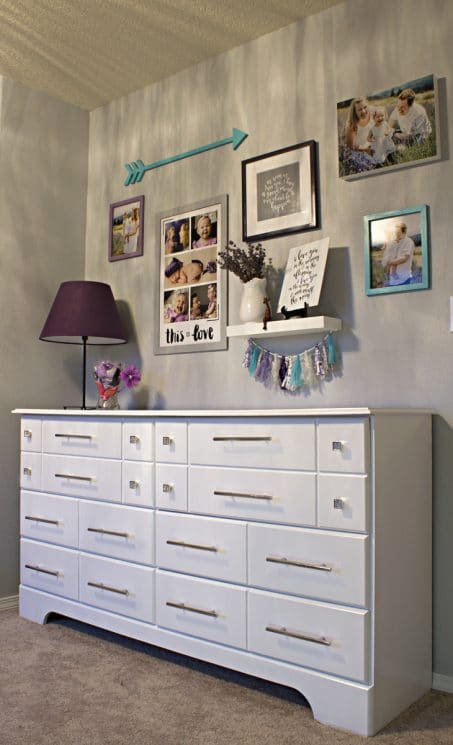
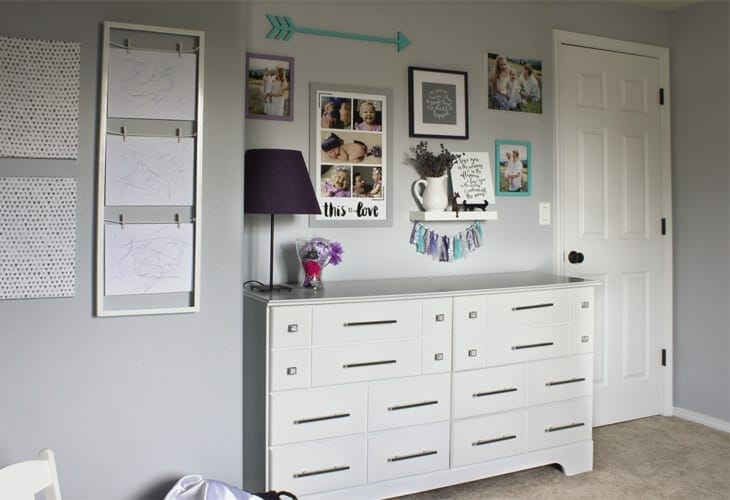
And since we all love a good before and after, check out this transformation!
Did you see all about that gallery wall we put together? I LOVE how it turned out and perfectly shows Clara’s personality! Get all the details here.


This is so great. I admire your imagination. Good looking piece. Great job.