Learn how to sew a nursing cover with this simple DIY tutorial to make breastfeeding a breeze when you feel like you need to cover up. Free pattern included!
Years ago I was trying to come up with a quick and easy DIY baby shower gift for a friend who was pregnant with her first. I knew she wanted to try breastfeeding and found this tutorial from Linda at Craftaholics Anonymous on how to make a nursing cover.
I knew it’d be perfect!
Through the years I’ve adapted that nursing cover into something that I think works just a little better. I’ve always found that nursing covers you can buy tend to not be wide enough and I feel exposed. After making a fair share of these as gifts I thought I’d share with you how to make your own nursing cover.
I made this nursing cover for my sister who welcomed her first baby in May. It makes the perfect baby shower gift or as an addition into the ultimate baby shower gift basket, like what I did with my sister. You can see it tucked in the back of the basket.
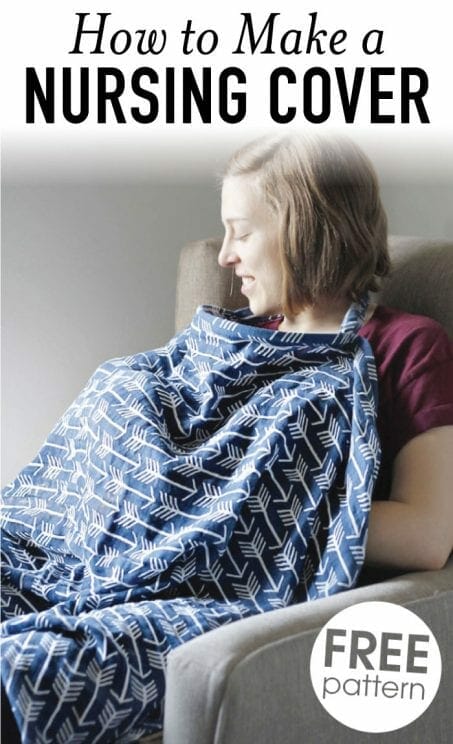
These nursing covers are not only perfect to give you full coverage, especially as your baby gets older and more wiggly, BUT the curved boning gives you easy viewing access to your sweet little one as they eat. Here’s what you’ll need to make your own.
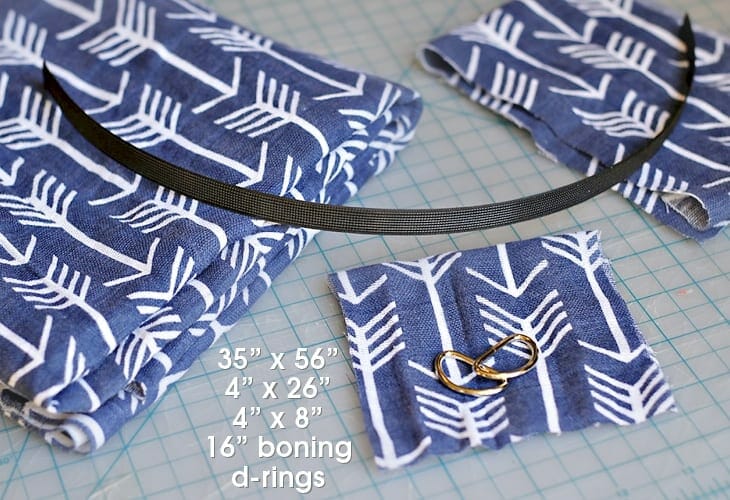
Supplies
- 35″ x 56″ lightweight fabric
- 4″ x 26″ strap fabric
- 4″ x 8″ for d-ring strap fabric
- 16″ boning (I like this 1/2 covered poly boning…I find it’s still flexible to fold up your nursing cover and put easily in your diaper bag but also provides enough support to give you easy viewing access to your little one without it flopping down.)
- 2 1″ d-rings
- Iron & ironing board
You can choose to use different fabric for the main cover and the straps or use all the same fabric. I typically choose to just use the same fabric so that it all looks well coordinated.
Instructions
1. Cut
Start by cutting out your fabric to the dimensions listed above.
2. Iron
On all edges of the main fabric, fold 1/4″ and iron and then fold over 3/4″ and iron again.
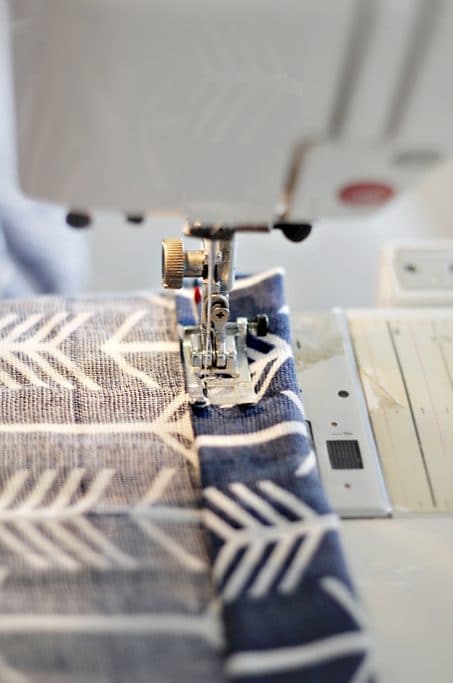
3. Stitch
On the top edge, stitch about 3/4″ from the edge making sure there is enough room for you to slide in the 1/2″ boning.
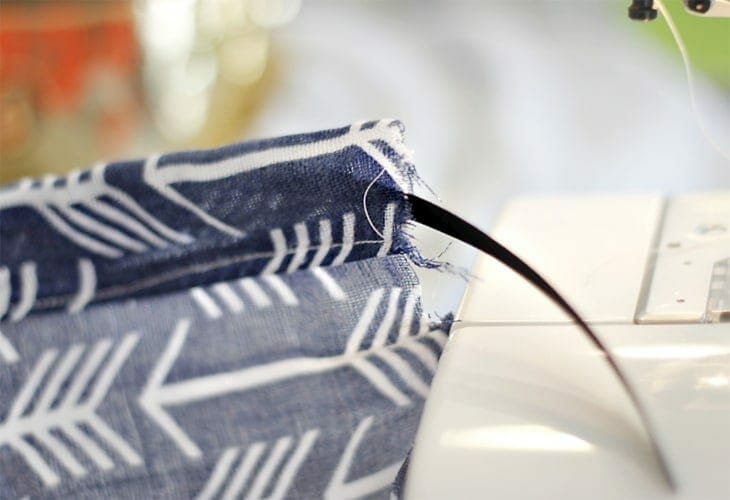
4. Boning
After you’ve top stitched all the way across, measure in 20″ from the edge and pinch the fabric. On the opposite side, slide in the boning until it hits your pinched fingers. With the 56″ wide fabric and 16″ boning this will get your boning centered on the fabric.
Now, while holding the boning in place, stitch a line on each edge of the boning on the folded seam to hold it in place at the center.
5. Top Stitch
Next, top stitch around the other three sides about 3/4″ from the edge to make nice, clean edges.
Ok, now it’s time to make your straps.
6. Straps
Take your 4″ x 8″ piece of fabric, fold it in half, and iron along the crease. Now open it up and fold in the long sides to the center and iron the creases as shown below.
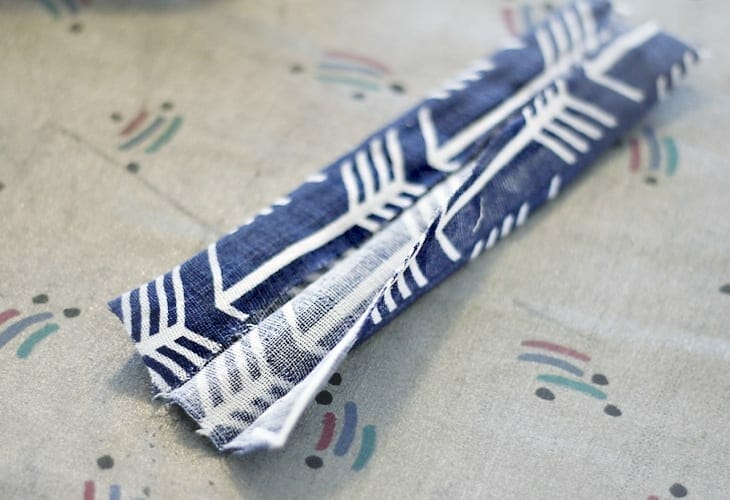
This gives you a two inch wide strap.
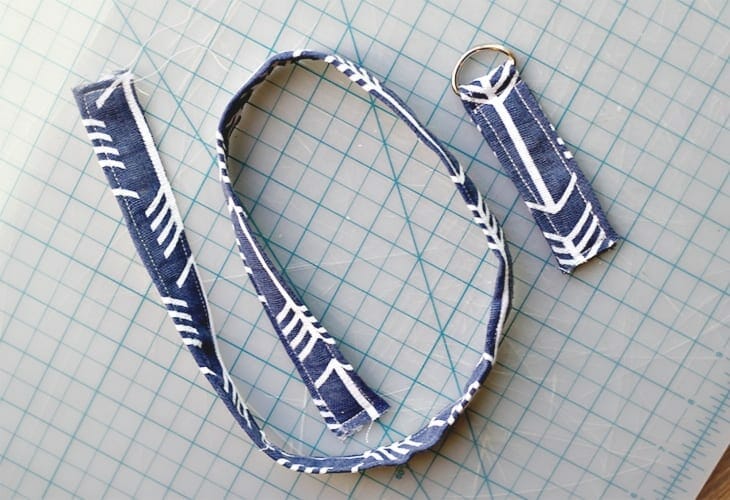
7. Add D-rings
Now fold the strap in half with the open seams in the middle. Place your strap through the d-rings and stitch along the edges and as close to the d-rings as you can get to hold them in place.
8. Iron Straps
Iron the long 26″ strap the same as you did with the short strap. Before you top-stitch, fold in the top and bottom ends of each strap to make a neat edge.
9. Stitch Straps
Next, top-stitch all along the sides as shown below.
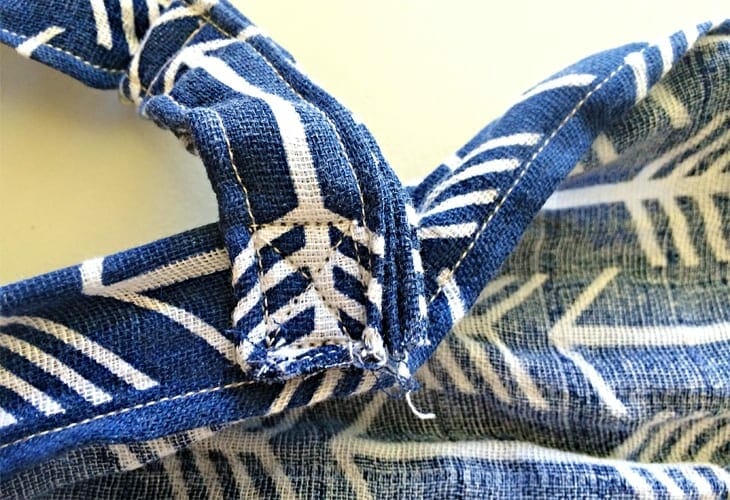
10. Add Straps
Once your straps are secured, it’s time to attach them to the nursing cover. First, take your short strap with the d-rings and sew it as shown below directly to the right of the boning on the inside of the cover.
Then, sew the long strap on the left side of the boning just as you did with the d-ring strap. This ensures that the straps are secure and will not come off the nursing cover when you pull it to tighten the straps.
Iron your nursing cover, cut off any loose strings, and you’re done! I love how simple this DIY project is and makes such a great baby shower gift.
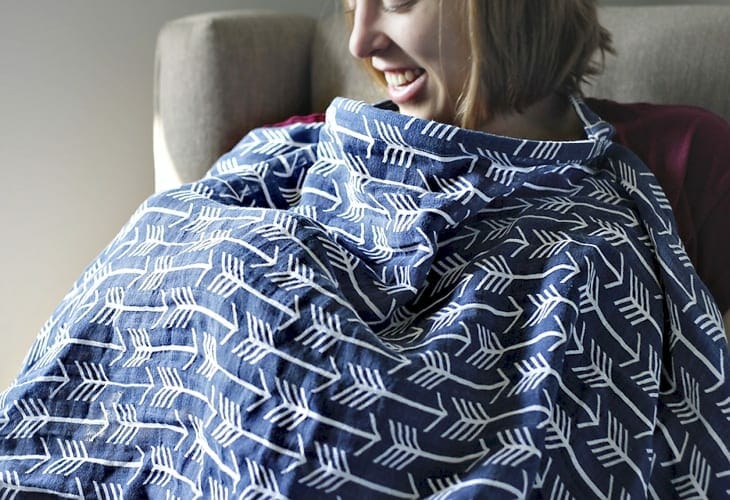
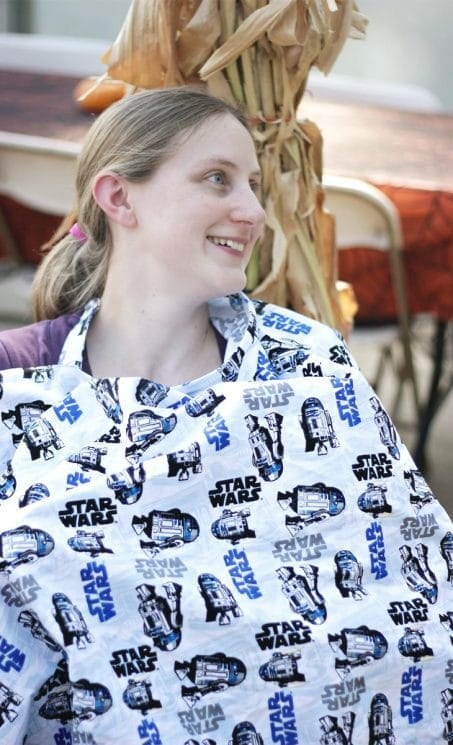
Plus, you can personalize them! I love choosing fabric depending on the theme of the baby’s nursery or just to fit the mom’s style. This friend went all out Star Wars in the nursery for her little boy and she was nervous that nursing covers don’t cover her enough so I made her an extra wide nursing cover to fit her theme. Thanks Teresa for letting me use your picture!
It’s your turn to sew a nursing cover!
Think of what friend who could use a personalized nursing cover and head to the fabric store to pick out your fabric.
You might also love these posts:


Thanks so much for this! I found I didn’t need such a wide one, so just used the width of the fabric. Turned out a dream, thanks again :)