
Key Takeaways
- Measure appliance openings, utility locations, delivery paths, and door clearances before comparing models.
- Choose capacity and features based on daily cooking routines, not just appearance or trend-driven options.
- Compare the total cost, including delivery, installation, energy and water use, maintenance, and required home upgrades.
- Matching finishes can create a unified kitchen, but the best package does not require a single brand.
- Select appliances before finalizing cabinets so that openings, panels, and ventilation are planned correctly.
Planning a kitchen appliance package early can prevent expensive changes later. It gives homeowners time to compare dimensions, cooking configurations, operating costs, and installation needs before cabinets, countertops, or utility work lock in the layout.
For Sacramento-area homeowners, Filco Superstore is a local appliance retailer with kitchen package options spanning major cooking, refrigeration, and dishwashing categories. Its package selection can be a useful point of comparison for shoppers evaluating a discounted kitchen package, especially when they need to coordinate appliance choices with delivery and installation across Sacramento and nearby Northern California communities.
Why Plan the Package Before Ordering
Buying several appliances together can simplify finish selection, delivery scheduling, and remodel coordination. It also makes it easier to compare the total cost of the kitchen rather than treating each appliance as a separate purchase.
Still, a package price is not automatically the lowest overall value. A less expensive set may require added trim, new electrical circuits, a gas connection, a water line, cabinet changes, or ventilation work. Compare the complete installed cost and confirm whether the package is flexible enough to substitute a model that better fits the room.
Step One: Measure the Kitchen Before Shopping
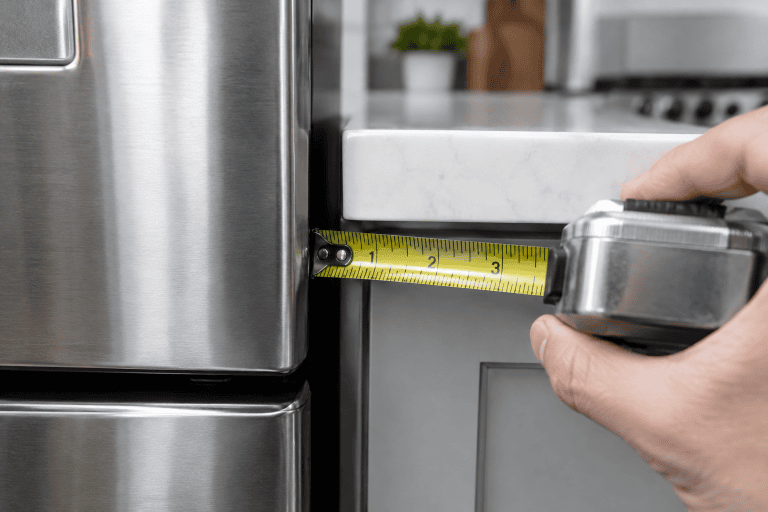
Use manufacturer specification sheets, not just a showroom estimate, when confirming fit. Record the dimensions of every opening and allow for the clearances specified for ventilation, cords, hoses, and door movement.
Phone-Friendly Measurement Checklist
- Width, height, and depth of each appliance opening.
- Counter depth, cabinet depth, and countertop overhang.
- Space in front of appliances for doors, drawers, and walkways.
- Locations of outlets, gas shutoffs, water lines, drains, and vents.
- Doorways, hallways, stairs, elevators, and turns on the delivery route.
- Nearby cabinet handles, islands, and walls that could obstruct a door swing.
Do not assume a standard-width model will fit a standard-looking opening. Handles, hinges, rear clearance, and required side gaps can affect the real space needed.
Step Two: Match Appliances to Everyday Habits
A serious home cook may prioritize a larger oven cavity, more burner flexibility, stronger ventilation, and refrigeration that keeps ingredients organized. A household that mostly prepares quick meals may benefit more from straightforward controls, easy-clean surfaces, a quiet dishwasher, and practical refrigerator storage.
Small households may prefer compact capacity that preserves cabinet or counter space. Households that entertain often may value a wider refrigerator, a second oven, flexible freezer storage, or a beverage center. The right choice is the one that supports frequent routines without paying for features that will sit unused.
Step Three: Choose a Cooking Layout That Fits
- Freestanding range: Often a simpler replacement option because the cooktop and oven are combined in a single unit.
- Slide-in range: Creates a more integrated look with the countertop, but the cutout and rear clearance must match the model.
- Cooktop and wall oven: Allows separate placement and can make oven access more comfortable when installed at a suitable height.
- Induction cooktop: Uses electromagnetic energy to heat compatible cookware and offers a smooth cooking surface.
- Gas cooking: Remains an option for shoppers who prefer visible flame control, provided the home has an appropriate gas connection and ventilation plan.
Before committing, verify the fuel type, electrical capacity, hood or downdraft requirements, and any local installation rules. These details can determine whether a preferred model is practical for the existing kitchen.
Step Four: Compare Energy and Operating Costs
The purchase price is only part of the decision. Review the yellow EnergyGuide label for estimated annual energy use and operating cost comparisons among similar models. Refrigerator size and configuration matter because larger units generally use more energy than smaller ones.
When comparing refrigerators, the ENERGY STAR guidance notes that certified models are about 9 percent more energy-efficient than models that meet the federal minimum standard. Consider capacity, layout, door count, placement near heat sources, and the cost of replacement water filters when comparing otherwise similar models.
Dishwasher comparisons should include water use, cycle choices, rack layout, sound level, and drying options. Modern certified dishwashers may use soil sensors, improved filtration, and more efficient spray systems to reduce water and energy use, as outlined in ENERGY STAR’s dishwasher buying guidance. Maintenance needs, detergent preferences, and filter cleaning should also be considered.
Step Five: Coordinate Finishes Without Overpaying
Stainless steel, black stainless, matte black, white, and panel-ready designs can all work in a cohesive kitchen. Look beyond color alone. Handle shape, logo placement, control-panel style, edge details, and sheen can make nearby appliances look noticeably different.
If appliances sit side by side, view finish samples under the kitchen’s actual lighting when possible. Matching brands can simplify the visual result, but selecting the strongest model in each category may provide better long-term function.
Step Six: Review Smart Features Carefully
Connected features may provide alerts, remote monitoring, diagnostics, or scheduling. Ask whether the appliance works normally without Wi-Fi, whether an app is required, how often the feature will be used, and whether added technology could complicate future service.
Step Seven: Confirm Delivery, Installation, and Service
Product selection is only one part of a successful order. Ask who handles delivery, haul-away, installation, damage inspection, warranty registration, and service calls. Also, confirm whether required hoses, cords, trim kits, brackets, venting parts, or conversion components are included.
Build a Practical Budget and Avoid Common Mistakes
Set aside funds for the appliance purchase, delivery, removal, installation, utility modifications, cabinet changes, and a contingency for delays or discontinued models. Keep model numbers, quoted prices, rebate details, delivery dates, and warranty terms in one written list.
Before placing an order, confirm that every appliance fits its opening, doors and drawers can open fully, utilities are ready, and the installer can complete the work. Avoid choosing by finish alone, assuming all stainless steel matches, or waiting until the end of a remodel to make appliance decisions.
Conclusion
A well-planned kitchen appliance package should fit the room, support daily habits, and remain sensible to operate over time. Careful measurement, realistic feature priorities, energy comparisons, and a complete installation budget can help homeowners choose a package that works smoothly from delivery day onward.